Adding Data
As mentioned in the Creating a Database section, you can choose to supply data files to load at database creation time to bulk load data. This page discusses adding data to an existing Stardog database.
Page Contents
Supported Data Formats
Stardog supports the following data formats:
- N-Triples
- RDF/XML
- Turtle
- TriG
- N-Quads
- JSON-LD
Supported Compression Formats
Stardog supports loading data from compressed files directly: there’s no need to uncompress files before loading. Loading compressed data is the recommended way to load large input files. Stardog supports GZIP, BZIP2 and ZIP compressions natively.
GZIP and BZIP2
A file passed provided to Stardog to be loaded will be treated as compressed if the file name ends with .gz or .bz2. The RDF format of the file is determined by the penultimate extension. For example, if a file named test.ttl.gz is used as input, Stardog will perform GZIP decompression during loading and parse the file with Turtle parser. All the formats supported by Stardog can be used with compression.
If Stardog does not recognize the format or compression for the file being added, you can specify them explicitly using the --format and --compression options when adding data via the CLI.
ZIP
The ZIP support works differently since zipped files can contain many files. When an input file name ends with .zip, Stardog performs ZIP decompression and tries to load all the files inside the ZIP file. The RDF format of the files inside the zip is determined by their file names. If there is an unrecognized file extension (e.g. .txt), then that file will be skipped.
ZIP files can only be added via the CLI or Stardog Studio. If adding via HTTP, Java API, etc, you must first unzip the files on the client side.
Adding Data via the CLI
Use the data add CLI command to add data to a database in a single commit.
The add operation is atomic – if multiple files are being added to the database and there is an error adding one or more of the files, the entire operation will be rolled back.
There are 2 required arguments for the data add command:
- The first final argument to the command is the name of the database or full connection string of the database (e.g.
http://remote-server:5820/myDatabase).- If only the name is provided, the default server URL will be prepended to the name of the database in order to construct the connection string.
- The default server URL will be read from the JVM argument
-Dstardog.default.cli.serverprovided at startup.- If the JVM argument is not set, the default value
http://localhost:5820is used. - If the server URL has no explicit port value, the default port value
5820is used.
- If the JVM argument is not set, the default value
- To use a secure connection, you should specify the full connection with
https.
- Subsequent arguments are the list of files whose contents should be added to or removed from the database and, optionally, the named graph(s) for the files.
- The named graphs are denoted with a
@and all the files specified after a named graph (and before the next graph) are added into that named graph. - The files to be loaded are assumed to be on the client side and will be sent over network to the server. To indicate the files are on the server side, pass in the
--server-sideflag. The client will just send the file path to the server.
- The named graphs are denoted with a
Add Data to the Default Graph
To load a Turtle file (file.ttl) into the default graph of a database:
stardog data add --format turtle myDatabase file.ttl
Add Data to a Specific Named Graph
To load data in an N-Triples file to one specific named graph (urn:g1) on a remote server:
stardog data add --named-graph urn:g1 -- http://remote-server:5820/myDatabase path/to/data.nt
Add Data to Multiple Named Graphs
To load data into multiple named graphs:
stardog data add myDatabse input0.ttl @urn:g1 input1.ttl input2.ttl @urn:g2 input3.ttl @ input4.ttl
In the above example:
input0.ttlis loaded into the default graphinput1.ttlandinput2.ttlare loaded intourn:g1input3.ttlis loaded intourn:g2input4.ttlis loaded into the default graph (@denotes to the CLI to switch back to adding to default graph)
Add Data that Exists on the Server Side
To load data that exists on the server side:
stardog data add --server-side --named-graph urn:g1 -- http://remote-server:5820/myDatabase path/on/server/data.nt
Clear the Database before Adding Data
Use the --remove-all flag to delete all data in the target database prior to adding data to it.
stardog data add --remove-all myDatabase data.nt
Adding Data via Studio
There are 2 main ways to upload data in Stardog Studio:
Upload a Data File Directly
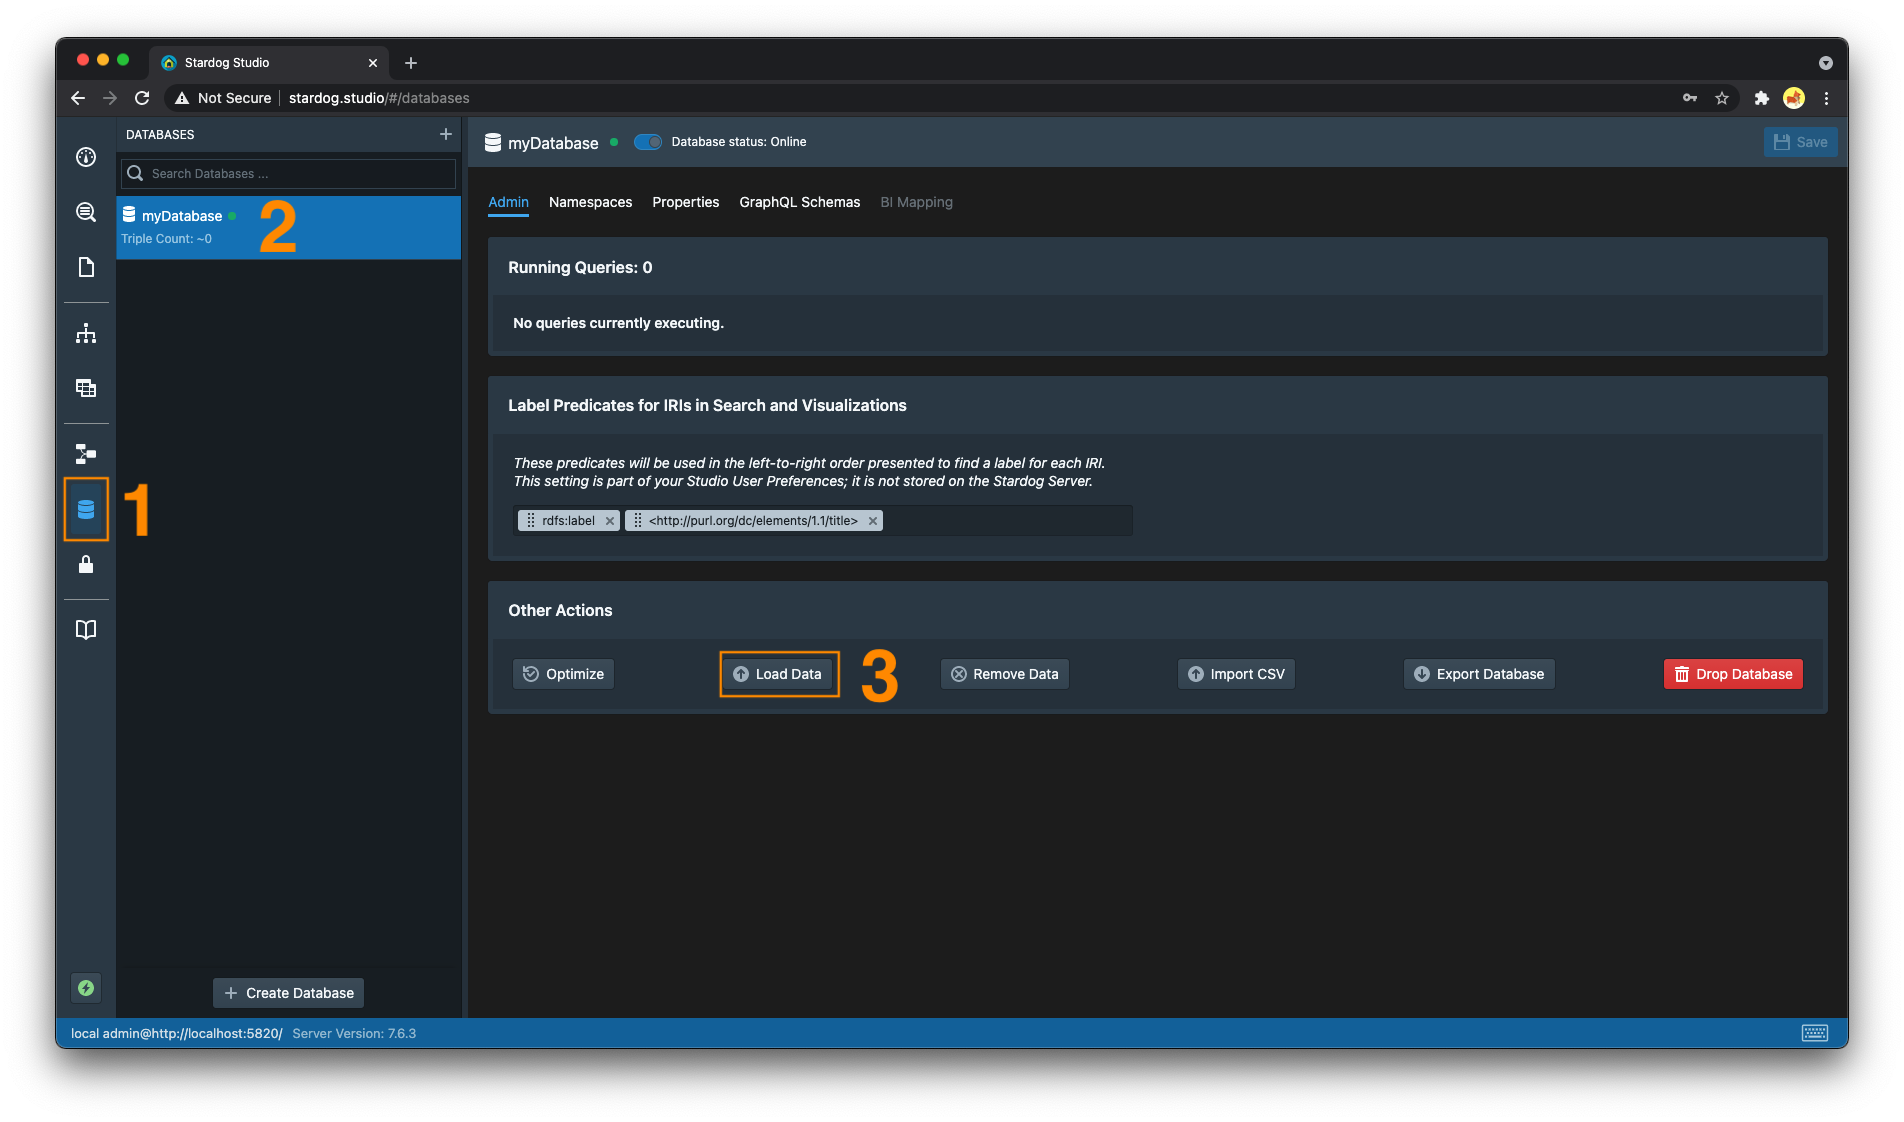
- Navigate to the “Databases” section
- Select the database you want to load data into
- Click on the “Load Data” button
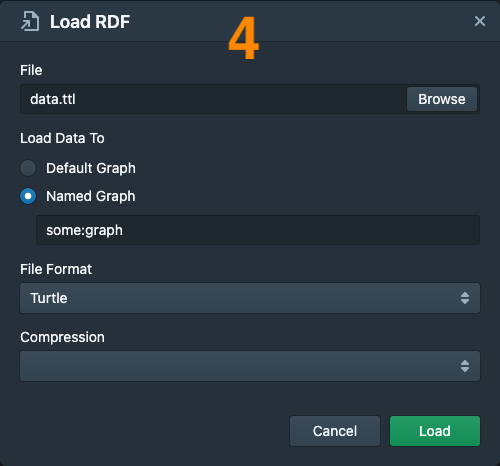
- Browse your filesystem and select the data file to upload
- Select the named graph to load the data into. By default, the data will be loaded into the default graph.
- The file format and compression will be inferred based on the extension of the file. Modify these 2 options as necessary.
Upload Data in the Workspace Editor
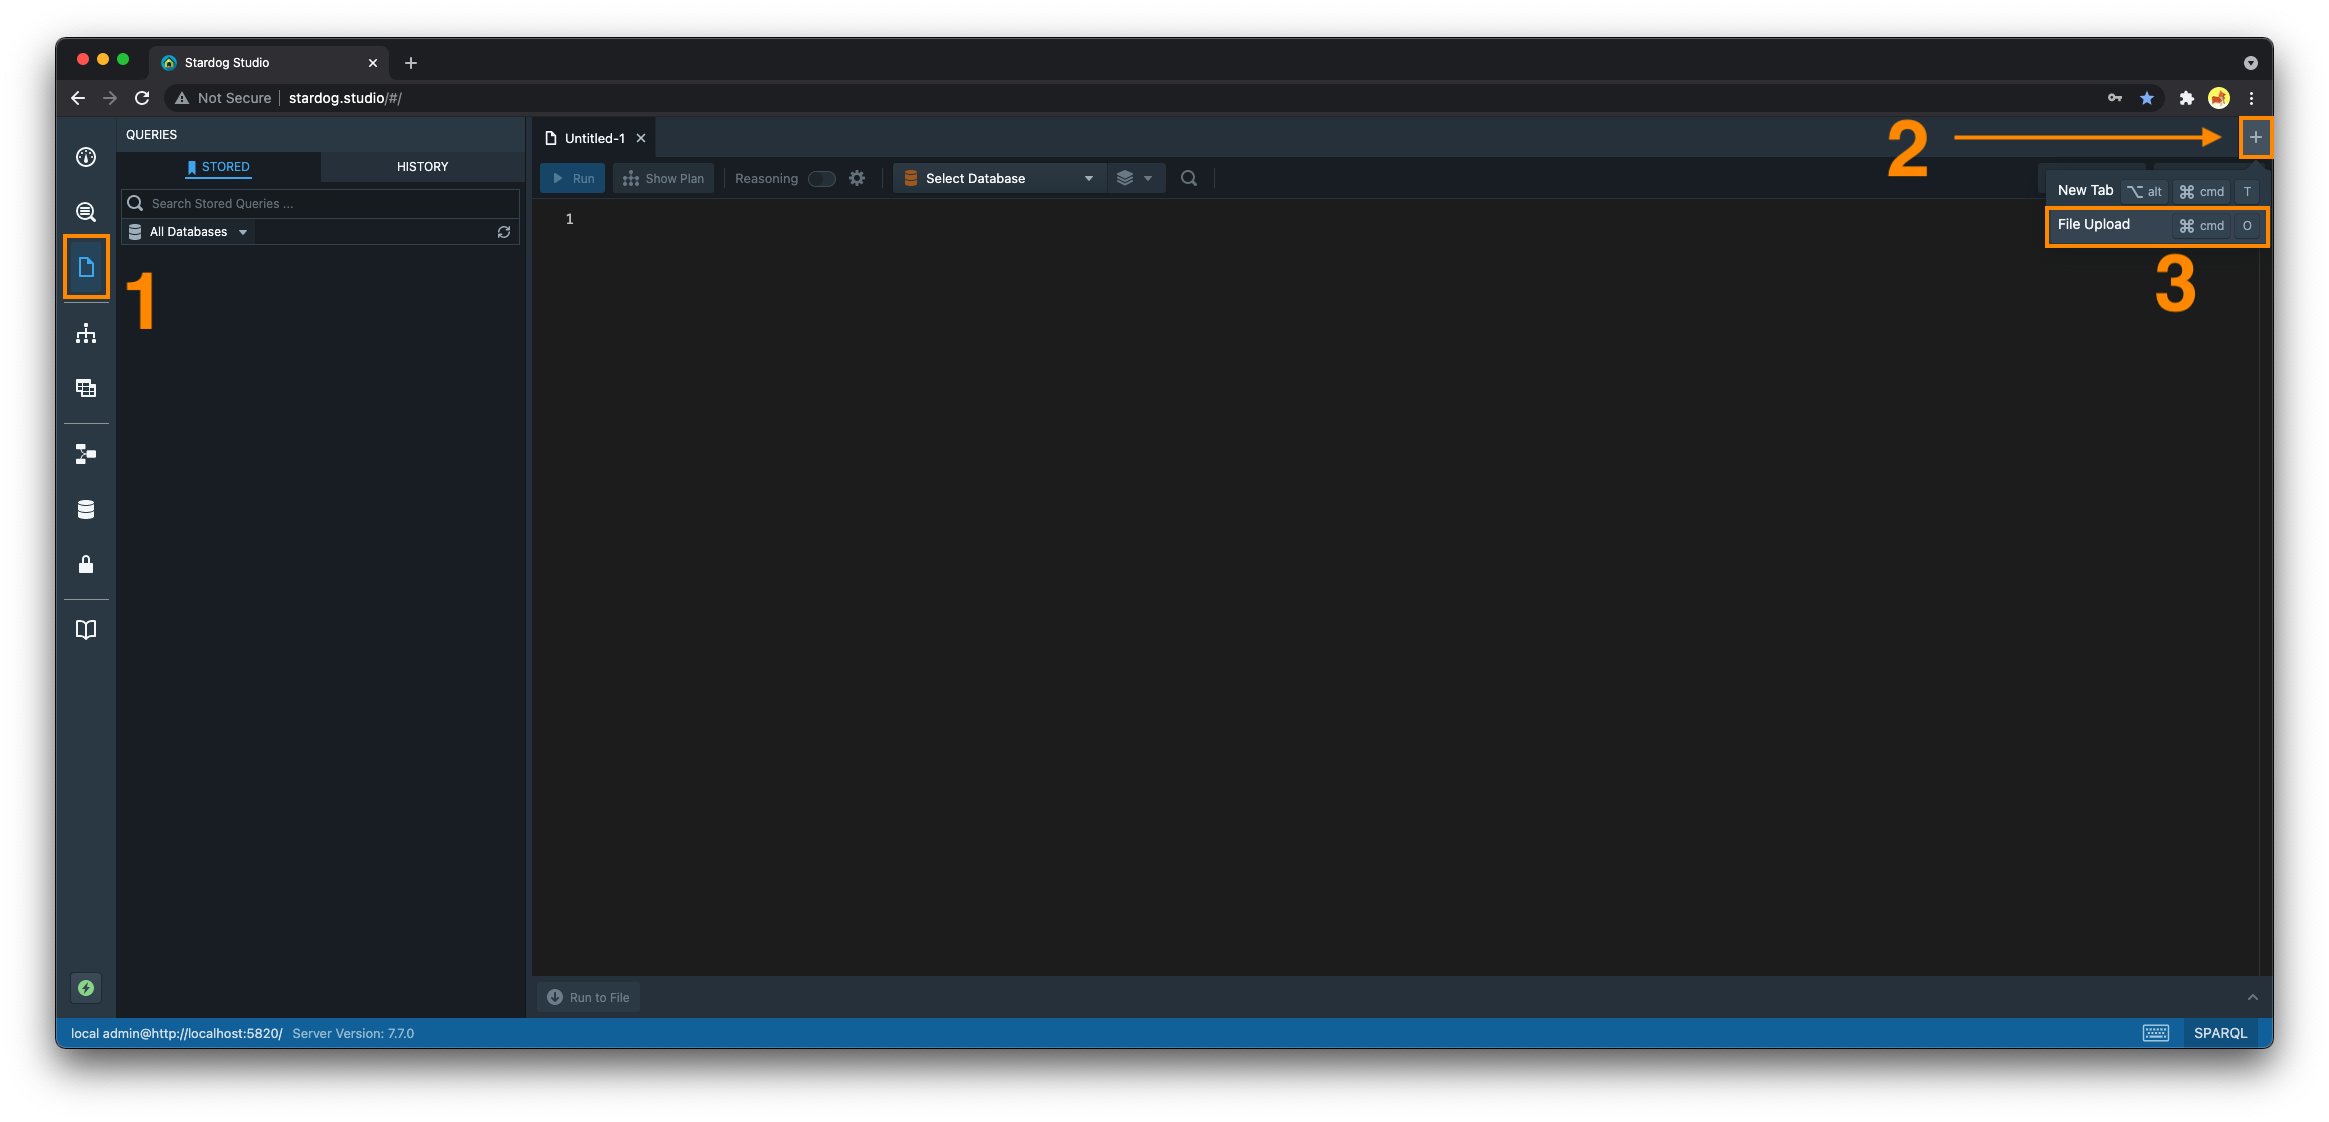
- Navigate to the “Workspace” section
- Select the
+button to open a new tab - Select “File Upload” and select the file you wish to upload from your filesystem
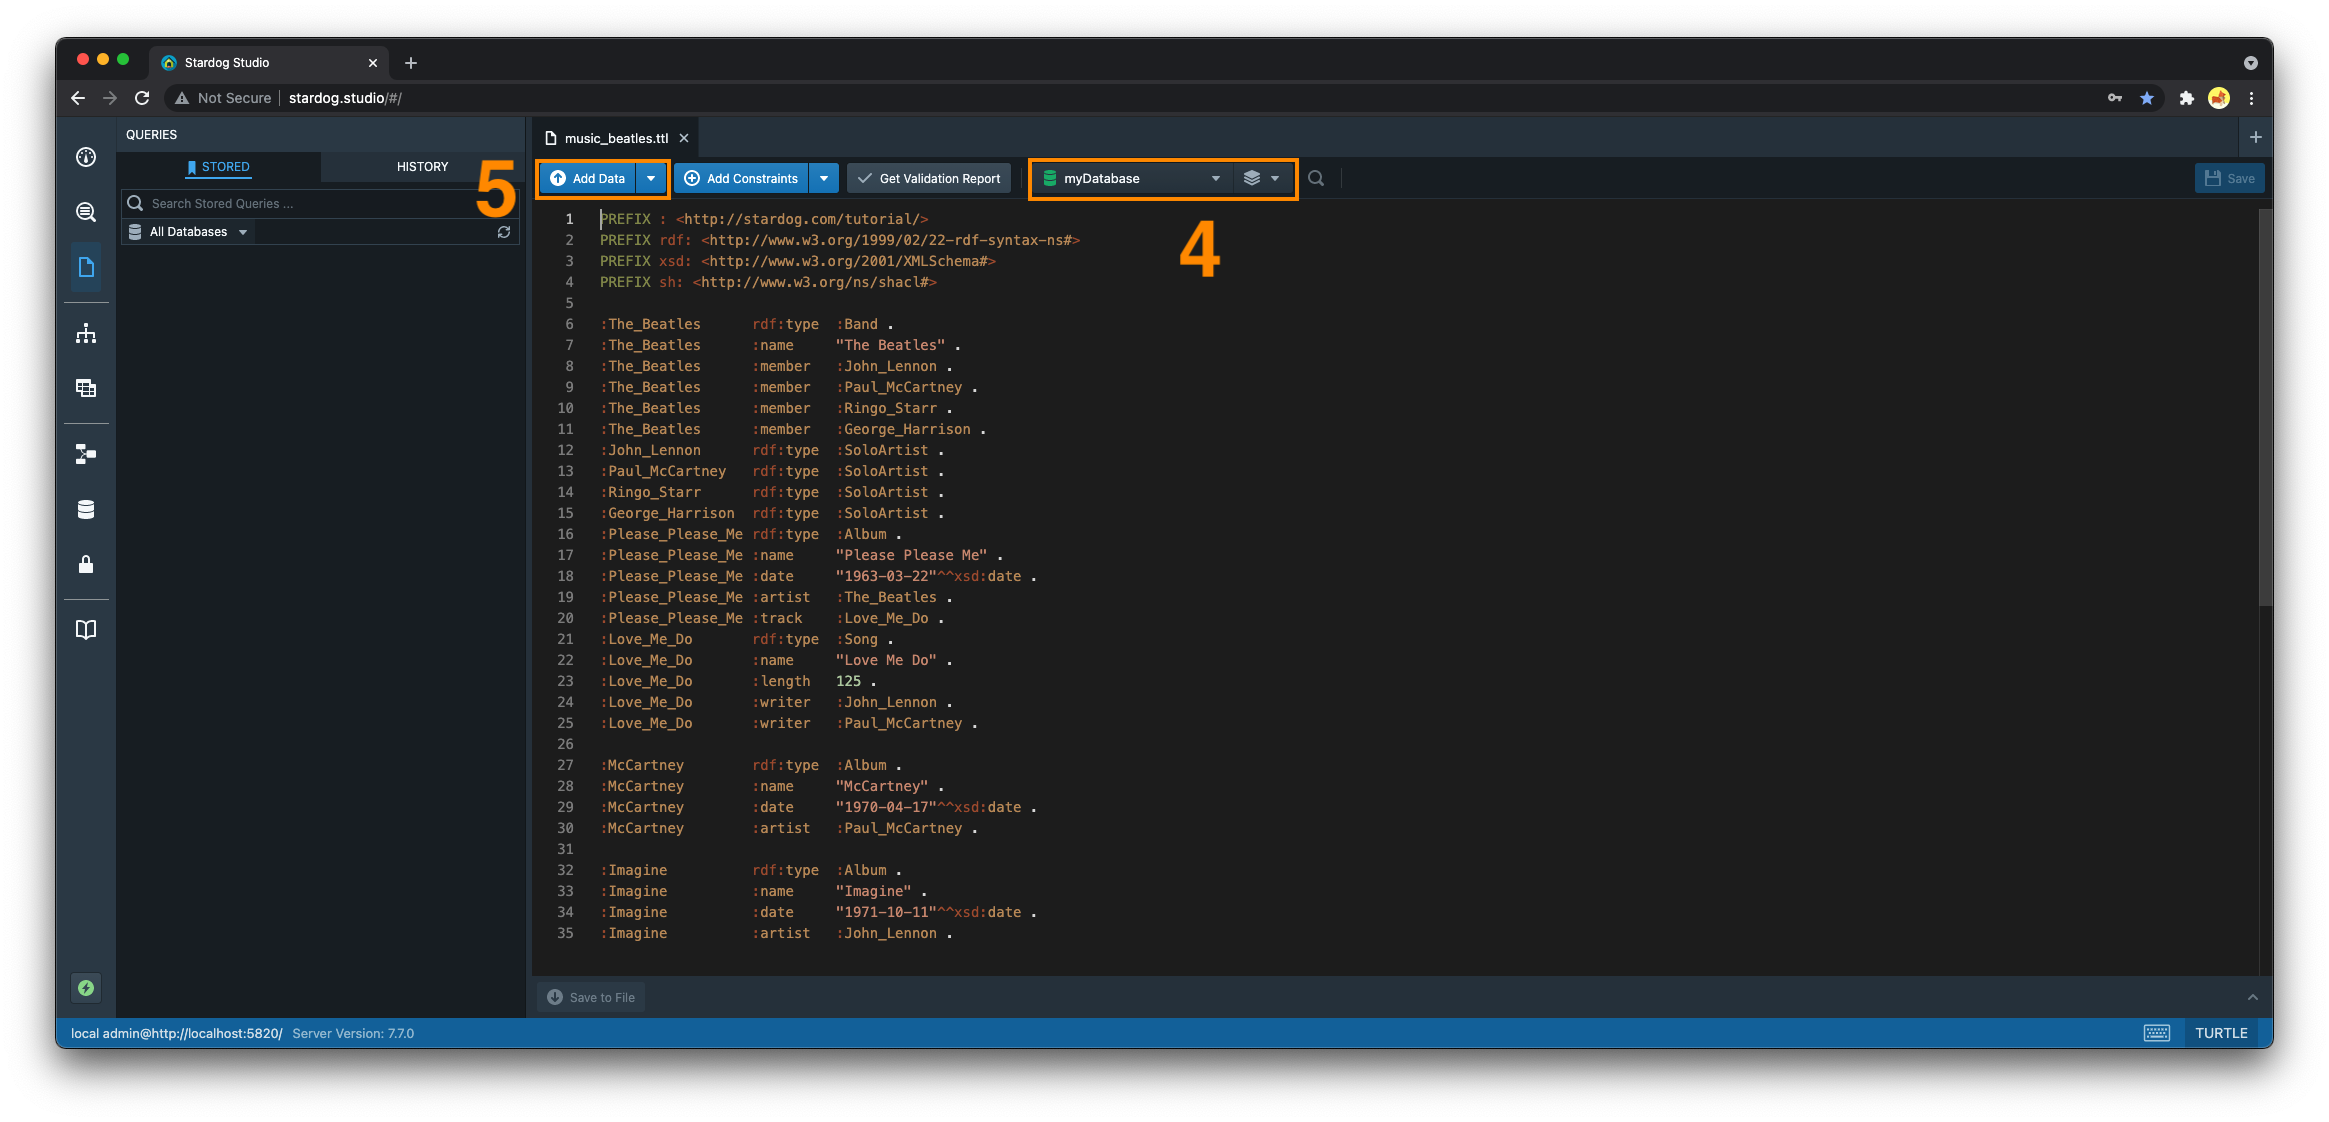
- Choose the database and named graph you wish to upload this data to
- By default, the data will be loaded into the default graph.
- Click the “Add Data” button
Adding Data via HTTP
HTTP Headers: Content-Type & Content-Encoding
All HTTP requests that are mutative (add or remove) must include a valid Content-Type header set to the MIME type of the request body, where “valid” is a valid MIME type for N-Triples, TriG, Turtle, N-Quads, JSON-LD, or RDF/XML:
| Data Format | MIME Type |
|---|---|
| N-Triples | application/n-triples |
| TriG | application/trig |
| Turtle | application/x-turtle or text/turtle |
| N-Quads | applicatioin/n-quads |
| JSON-LD | application/ld+json |
| RDF/XML | application/rdf+xml |
When adding compressed data, you must additionally provide a Content-Encoding header set to the compression format.
| Compression Format | Content Encoding |
|---|---|
| GZIP | gzip |
| BZIP2 | bzip2 |
Add Data Within a Transaction
The following examples show how to add data within a transaction.
Add Data to the Default Graph
-
Begin a transaction and set it to
txfor use in steps 2 and 3.tx=`curl -u username:password -X POST http://localhost:5820/myDatabase/transaction/begin` -
Add data within the transaction - when adding data to the default graph, specifying the query parameter
graph-uriis optional. It is shown here for clarity.If a graph format that specifies context/named-graph is used, such as TriG, the
graph-uriparameter will override the context(s) specified in data file. For example, ifgraph-uriis set tosome:graphand a TriG file is added that contains 10 different named graphs, all triples contained in those 10 graphs will be added tosome:graph. Thegraph-uriparameter can be omitted if you want to use the contexts specified in the file.curl -u username:password -X POST "http://localhost:5820/myDatabase/${tx}/add?graph-uri=default" \ -H "Content-Type: application/trig" \ --data-binary @/path/to/data.trig -
Commit the transaction after the data completes adding
curl -u username:password -X POST "http://localhost:5820/myDatabase/transaction/commit/${tx}"
Add Data to a Named Graph
-
Begin a transaction and set it to
txfor use in steps 2 and 3.tx=`curl -u username:password -X POST http://localhost:5820/mydb/transaction/begin` -
Add data within the transaction - the
graph-uriquery parameter is used to denote which named graph the data will be added to.# add data within the transaction curl -u username:password -X POST "http://localhost:5820/mydb/${tx}/add?graph-uri=urn:graph" \ -H "Content-Type: text/turtle" \ -H "Content-Encoding: gzip" \ --data-binary @/path/to/data.ttl.gz -
Commit the transaction after the data completes adding
curl -u username:password -X POST "http://localhost:5820/mydb/transaction/commit/${tx}"
Add Data Using the Graph Store HTTP Protocol
PUT /{db}
The Graph Store HTTP Protocol can be used to merge the RDF contained in the request into the specified graph. This can be used to create a new named graph or add data to an existing one. This will automatically begin and commit a new transaction when the data has finished loading.
curl -u username:password http://localhost:5820/myDatabase?graph=urn:graph -X POST \
-H "Content-Type: text/turtle" \
-H "Content-Encoding: gzip" \
--data-binary @foo.ttl.gz
For more information see the HTTP API and the W3C SPARQL 1.1 Graph Store HTTP Protocol
POST /{db}
The Graph Store HTTP Protocol can also be used to overwrite and replace a named graph with the specified content in the request. If no graph exists, a new graph will be created. This will automatically begin and commit a new transaction when the data has finished loading.
curl -u username:password http://localhost:5820/myDatabase?graph=urn:graph -X PUT \
-H "Content-Type: text/turtle" \
-H "Content-Encoding: gzip" \
--data-binary @foo.ttl.gz
For more information see the HTTP API and the W3C SPARQL 1.1 Graph Store HTTP Protocol
Add Data with Java API
import com.complexible.stardog.api.Connection;
import com.complexible.stardog.api.ConnectionConfiguration;
import com.stardog.stark.Resource;
import com.stardog.stark.Statement;
import com.stardog.stark.Values;
import com.stardog.stark.io.RDFFormats;

import java.nio.file.Paths;
import java.util.Collection;
import java.util.Collections;

public class AddingData {

    public static void main(String[] args) {

        try (Connection aConn = ConnectionConfiguration
                .to("myDatabase") // the name of the db to connect to
                .server("http://localhost:5820") //server url
                .credentials("username", "password") // credentials to use while connecting
                .connect()) {

            //begin transaction
            aConn.begin();

            //add data that exists on client to a database (local or remote)
            aConn.add()
                    .io()
                    .format(RDFFormats.TURTLE)
                    .file(Paths.get("/path/to/data.ttl"));

            //create some data and add to a named graph
            Collection<Statement> aGraph = Collections.singleton(
                    Values.statement(Values.iri("urn:subj"),
                            Values.iri("urn:pred"),
                            Values.iri("urn:obj")));

            Resource aContext = Values.iri("urn:test:context");

            aConn.add().graph(aGraph, aContext);

            // commit transaction
            aConn.commit();
        }
    }
}
You must always enclose changes to a database within a transaction begin and commit or rollback. Changes are local until the transaction is committed or until you try and perform a query operation to inspect the state of the database within the transaction.
By default, RDF added will go into the default context unless specified otherwise. As shown, you can use Adder directly to add statements and graphs to the database; and if you want to add data from a file or input stream, you use the io, format, and stream chain of method invocations.
Add Data Directly from Amazon S3
You can use SPARQL’s LOAD operation to load a file in S3 to your database. To do so:
-
Create an entry in your password file:
s3:s3host:port:bucket:accessKey:secretKey -
Execute the
LOADquery::LOAD <s3://bucketName/path/to/file/to/load>- By default, the data will be loaded to the default graph. You can load the data into a named graph like so:
LOAD <s3://bucketName/path/to/file/to/load> INTO GRAPH <my:graph>