Getting Started Part 3: Creating a Knowledge Graph in Designer
Learn how to use create a Knowledge Graph in Designer
Page Contents
If you already have a model, such as a Designer or TTL file, click here to start by importing it to Stardog Cloud.
1. Creating your project
Stardog offers free Knowledge Graph endpoints to be used as learning environments. After creating your Stardog Cloud account and claiming your free Knowledge Graph endpoint, select Designer.
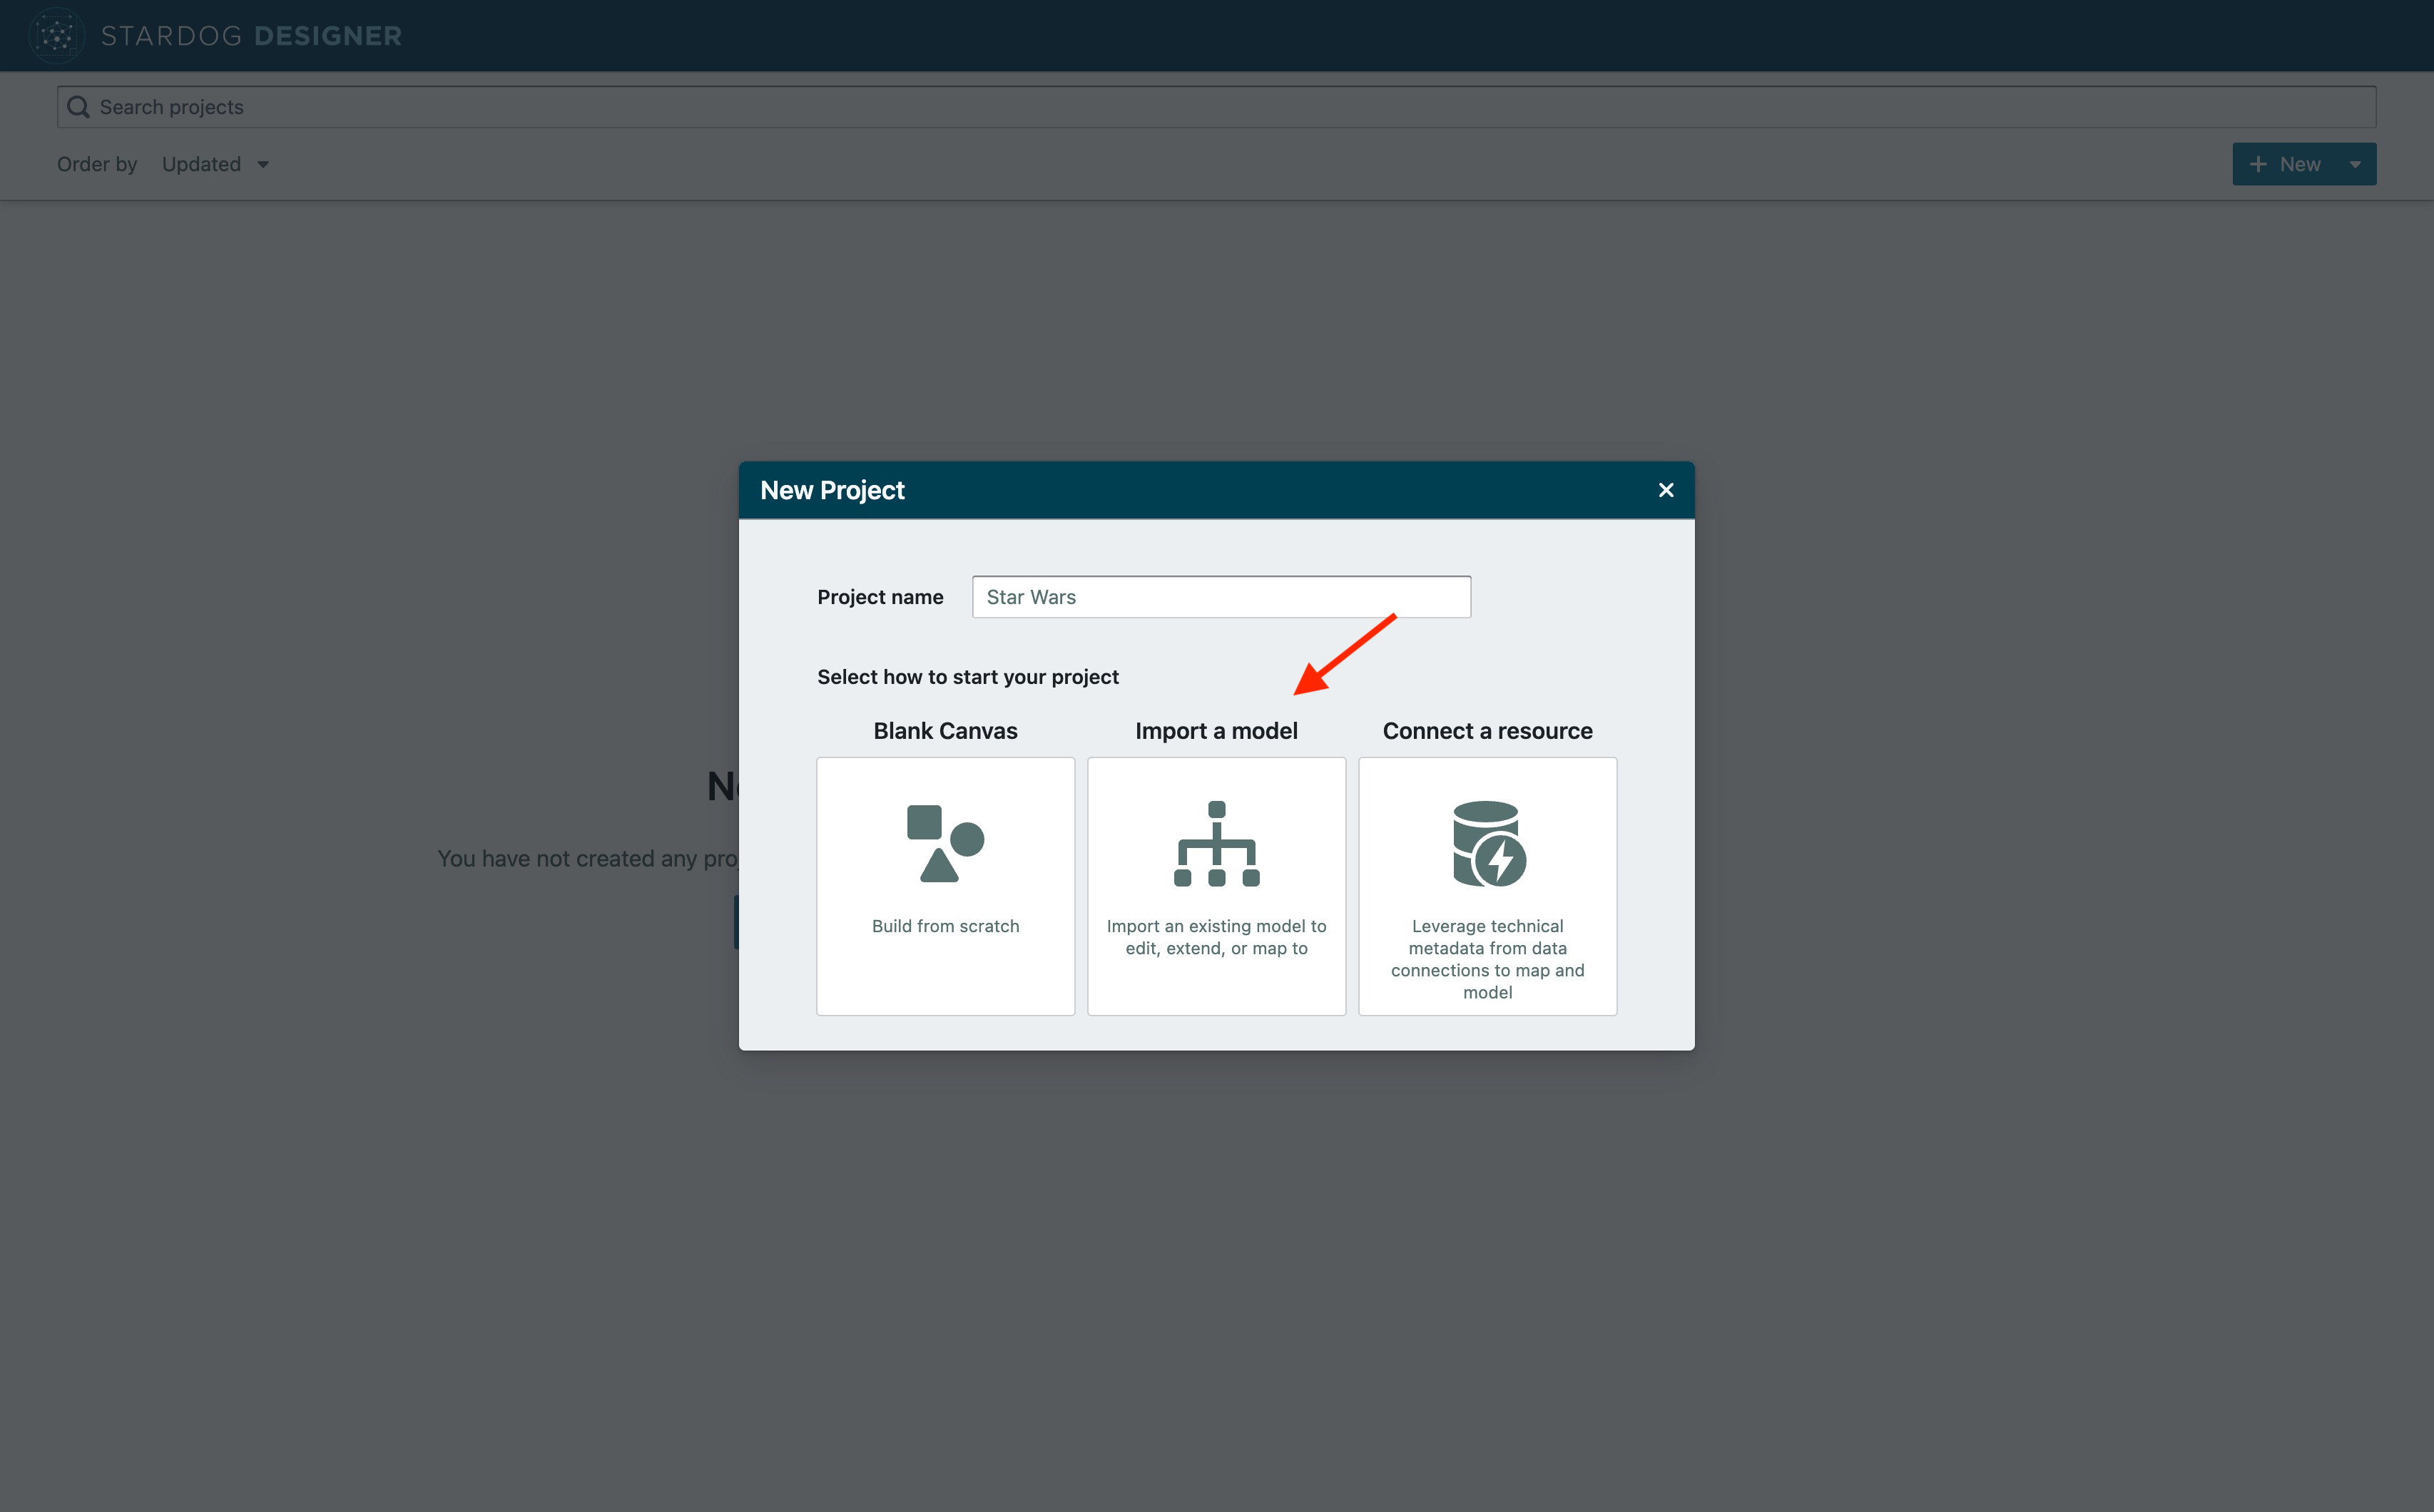
Then, name and create your first project.
Choose a name that is descriptive of your use case and as precise as possible. The project name will be used to identify the knowledge graph model.
2. Adding and mapping project resources and classes
Let’s get started by adding the following CSV files from a fictional company as our project resources. You can download them here:
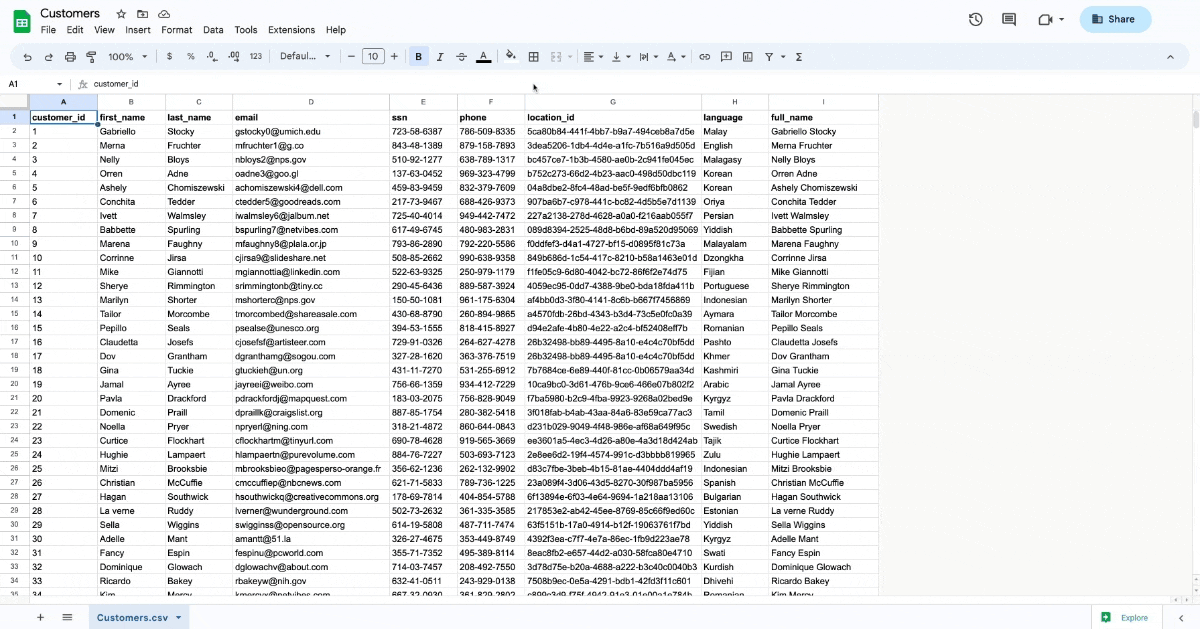
Project resources are the data sources of your knowledge graph.
After clicking on “+ Project Resource”, select “Browse Files” and upload your first CSV file. In this example, we will start with Customers. Note that you can customize the resource name, properties, and headers. When finished, click on “Create and Map”.
Mappings connect your project resources’ data to your graph’s concepts.
Designer will suggest a class for your model (in this case, Customers), a primary identifier (in this case, customer_id), a label, and its attributes. Click on “Create” to accept them.
Classes represent categories of instances with similar characteristics (e.g. Customers), and primary identifiers serve as reference points to make them searchable and connectable to other classes.
Then, we will import the second file (Locations) and click on “Create and Map”.
Since the model already has a class (Customer), Designer will give the option to use it on this mapping. But, since we want to create a second class, we will click on “Next” to make Designer suggest a new class.
In this case, the proposed class is Locations and the primary identifier is location_id.
You can drag and drop the elements on your canvas in your order of preference.
We will then upload the last file (Purchases) and go through the same steps.
Note that Designer allows you to edit classes, attributes, and mappings. Let’s change the classes from plural to singular, for example, naming them Customer, Purchase, and Location:
You can also edit the labels of the class instances which will be created by your mappings by clicking on the mappings between project resources and classes and then switching to the “Mappings” view.
As an example, let’s set the attribute state as the label of the class Location:
Labels define how instances will be displayed throughout Stardog Cloud. When no label is set, the instance label will be the same as the primary identifier.
3. Adding relationships
Now it’s time to define the relationships between these classes.
Relationship is the semantic explanation of the connection between two classes.
Here, we will add the relationship made_purchase between the classes Customer and Purchase and the relationship lives_in between Customer and Location. To do that, we will select the source class, click on “Add relationship”, define the target class, and click on “Create”.
4. Mapping relationships
We will now map the project resources to the relationships, as we have done with the classes. In this case, we need to connect a project resource that contains unique identifiers for both the source and target classes of the relationship, so they can get connected.
Here are the fields of our three project resources:
- Customers, with the fields
customer_id,first_name,last_name,email,ssn,phone,location_id,language, andfull_name. - Locations, with the fields
location_id,street_number,street_name,street_suffix,state,zip, andcity. - Purchases, with the fields
purchase_id,product_id,date,time,quantity,price,customer_id,card_id, andreward_account.
Based on their fields, we can map the relationship made_purchase with the resource Purchases, because it can connect to both classes involved in this relationship: customer_id is an attribute of the class Customer and purchase_id is an attribute of the class Purchase.
To do that, select the mapping “Purchases - Purchases”, then toggle to the Mapping view, set the source class to Customer, and the source primary identifier (in new mapping) to customer_id.
Let’s switch back to the “Model” view and do the same with Customers-Customers, by mapping it to the target class Location in lives_in (primary identifier: location_id).
5. Publishing your project
Switching back to the “Model” view, we can now see that all classes are mapped with our project resources. That means it’s time to publish our knowledge graph!
To do that, click on “Publish”, select or create a database, create a new model, and finish the process. You’ll also find other publishing options that cover other use cases.
Extra: Importing existing Designer projects and other data models
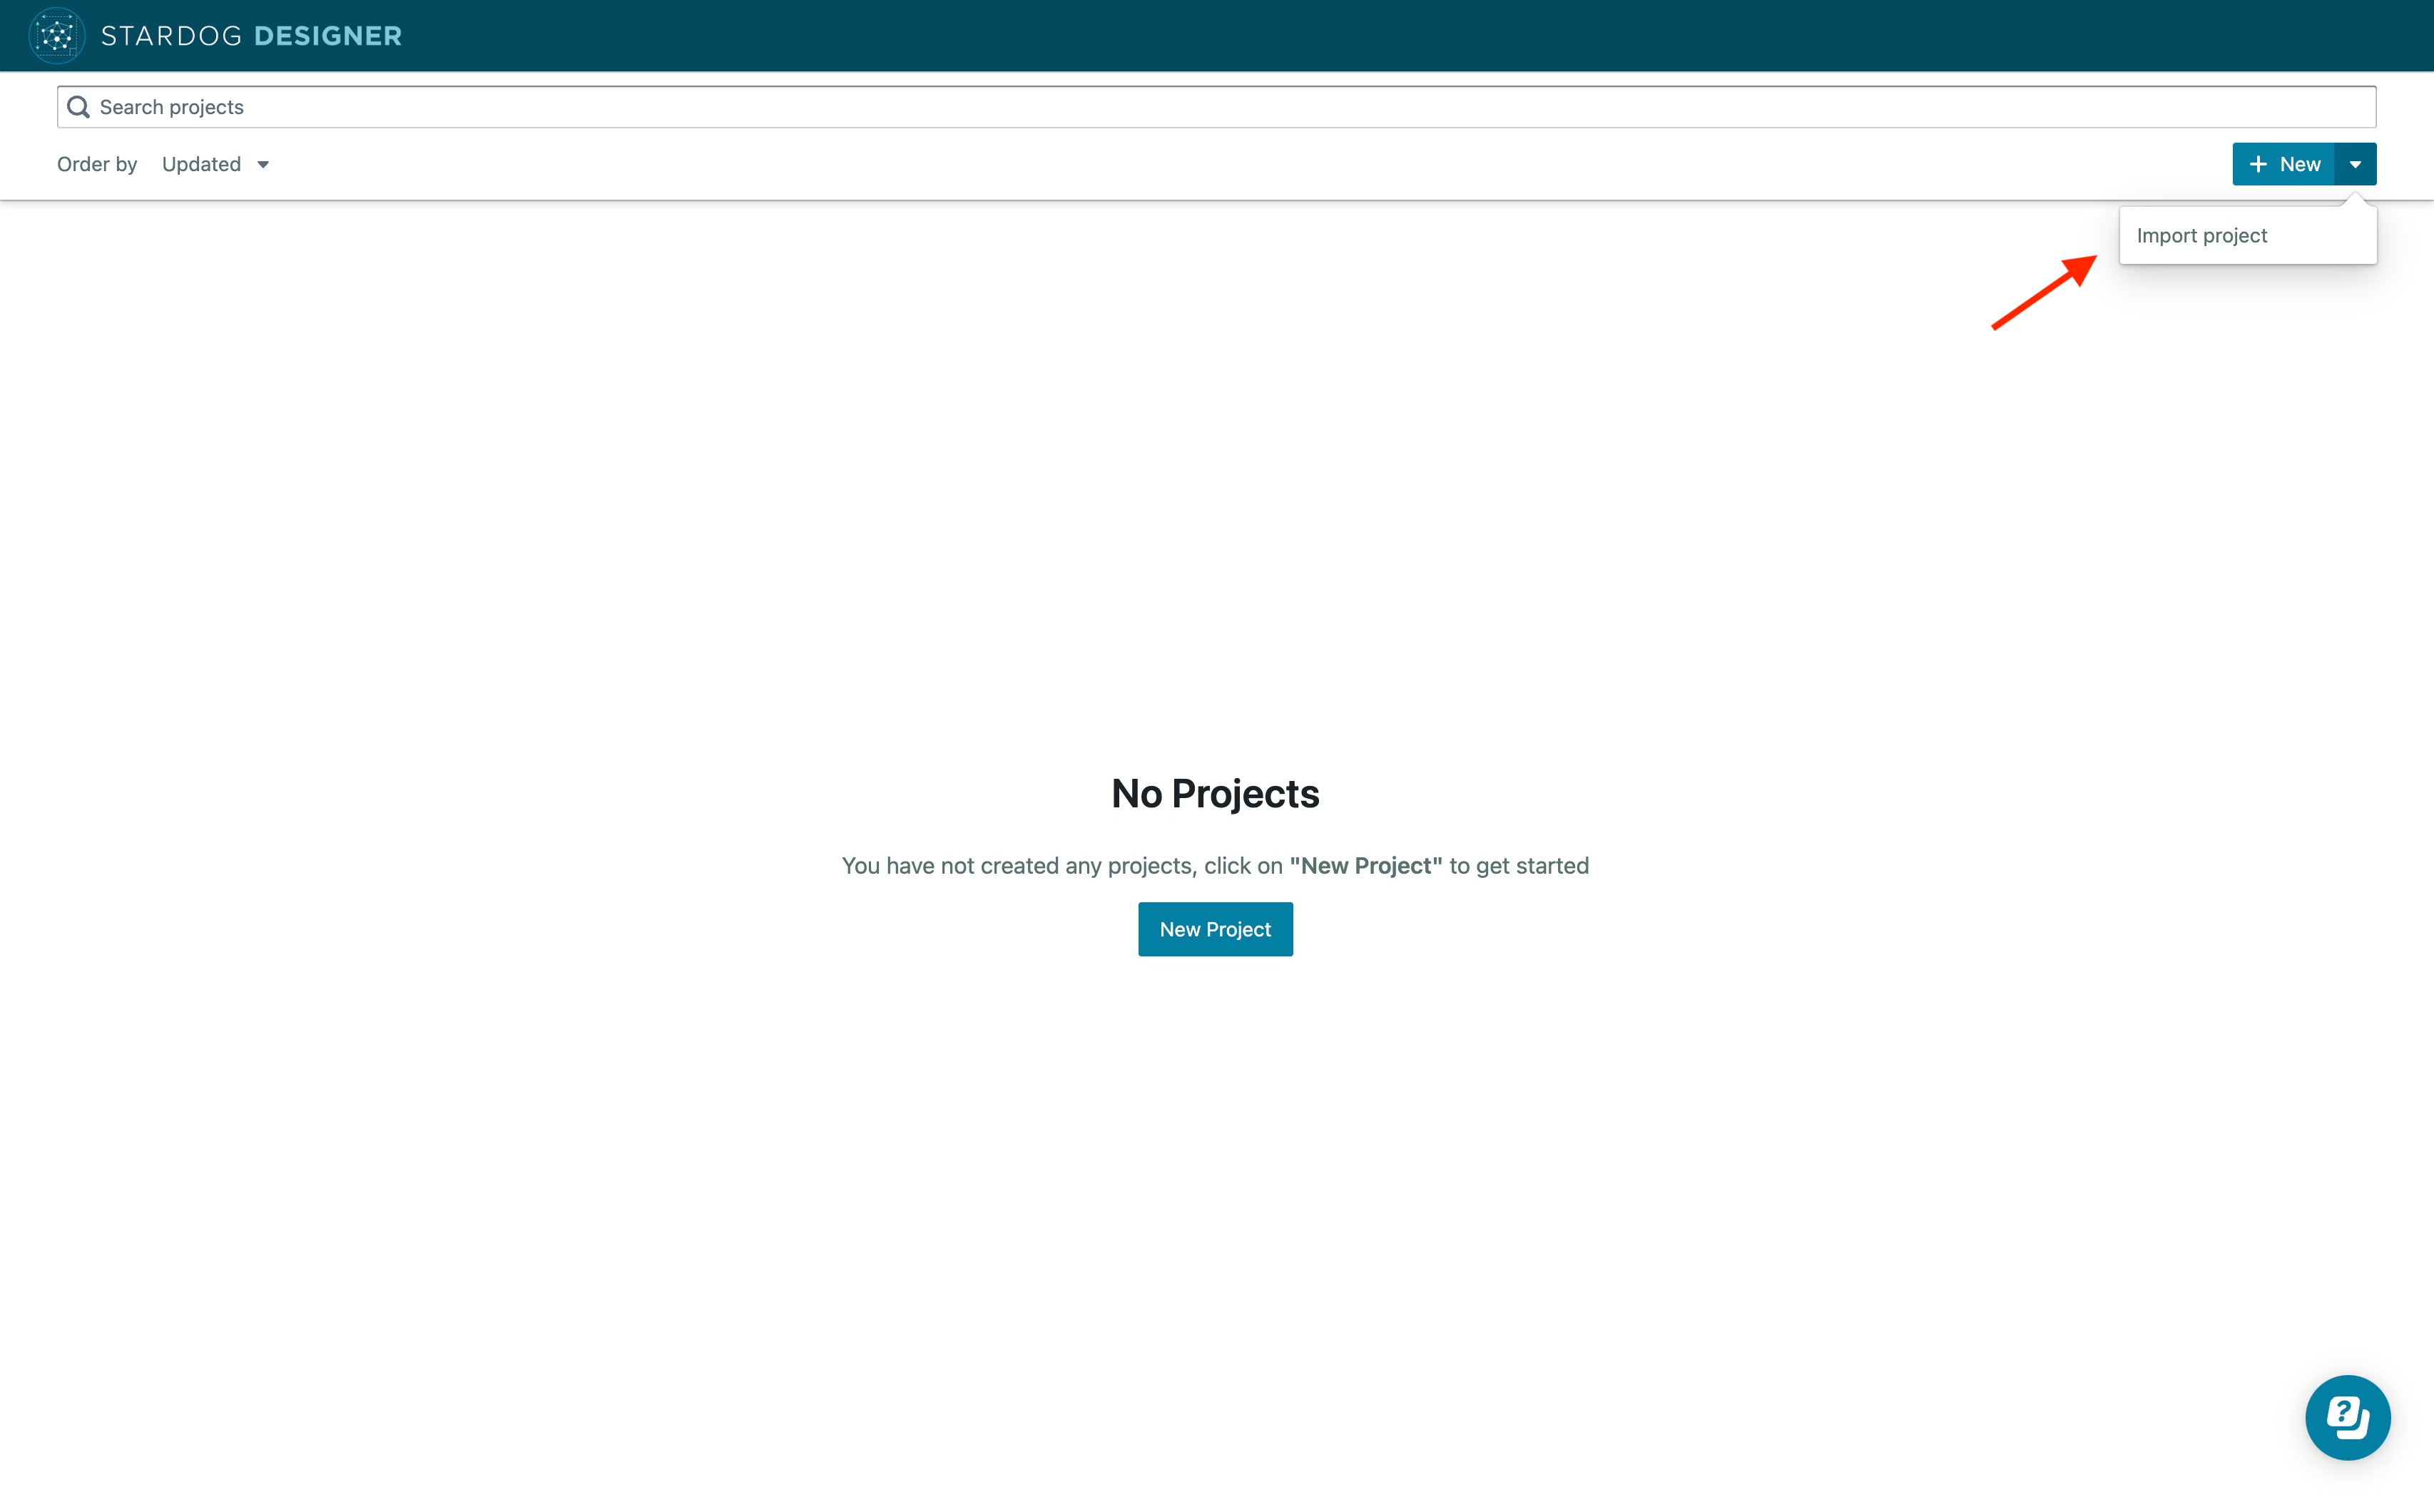
If you have a project created in Designer, select the option “Import a project” on Designer’s homepage.
If your knowledge graph endpoint does not already have a data model and you have a TTL data model file, you will need to first import your TTL data model file in Studio, then move to Designer.
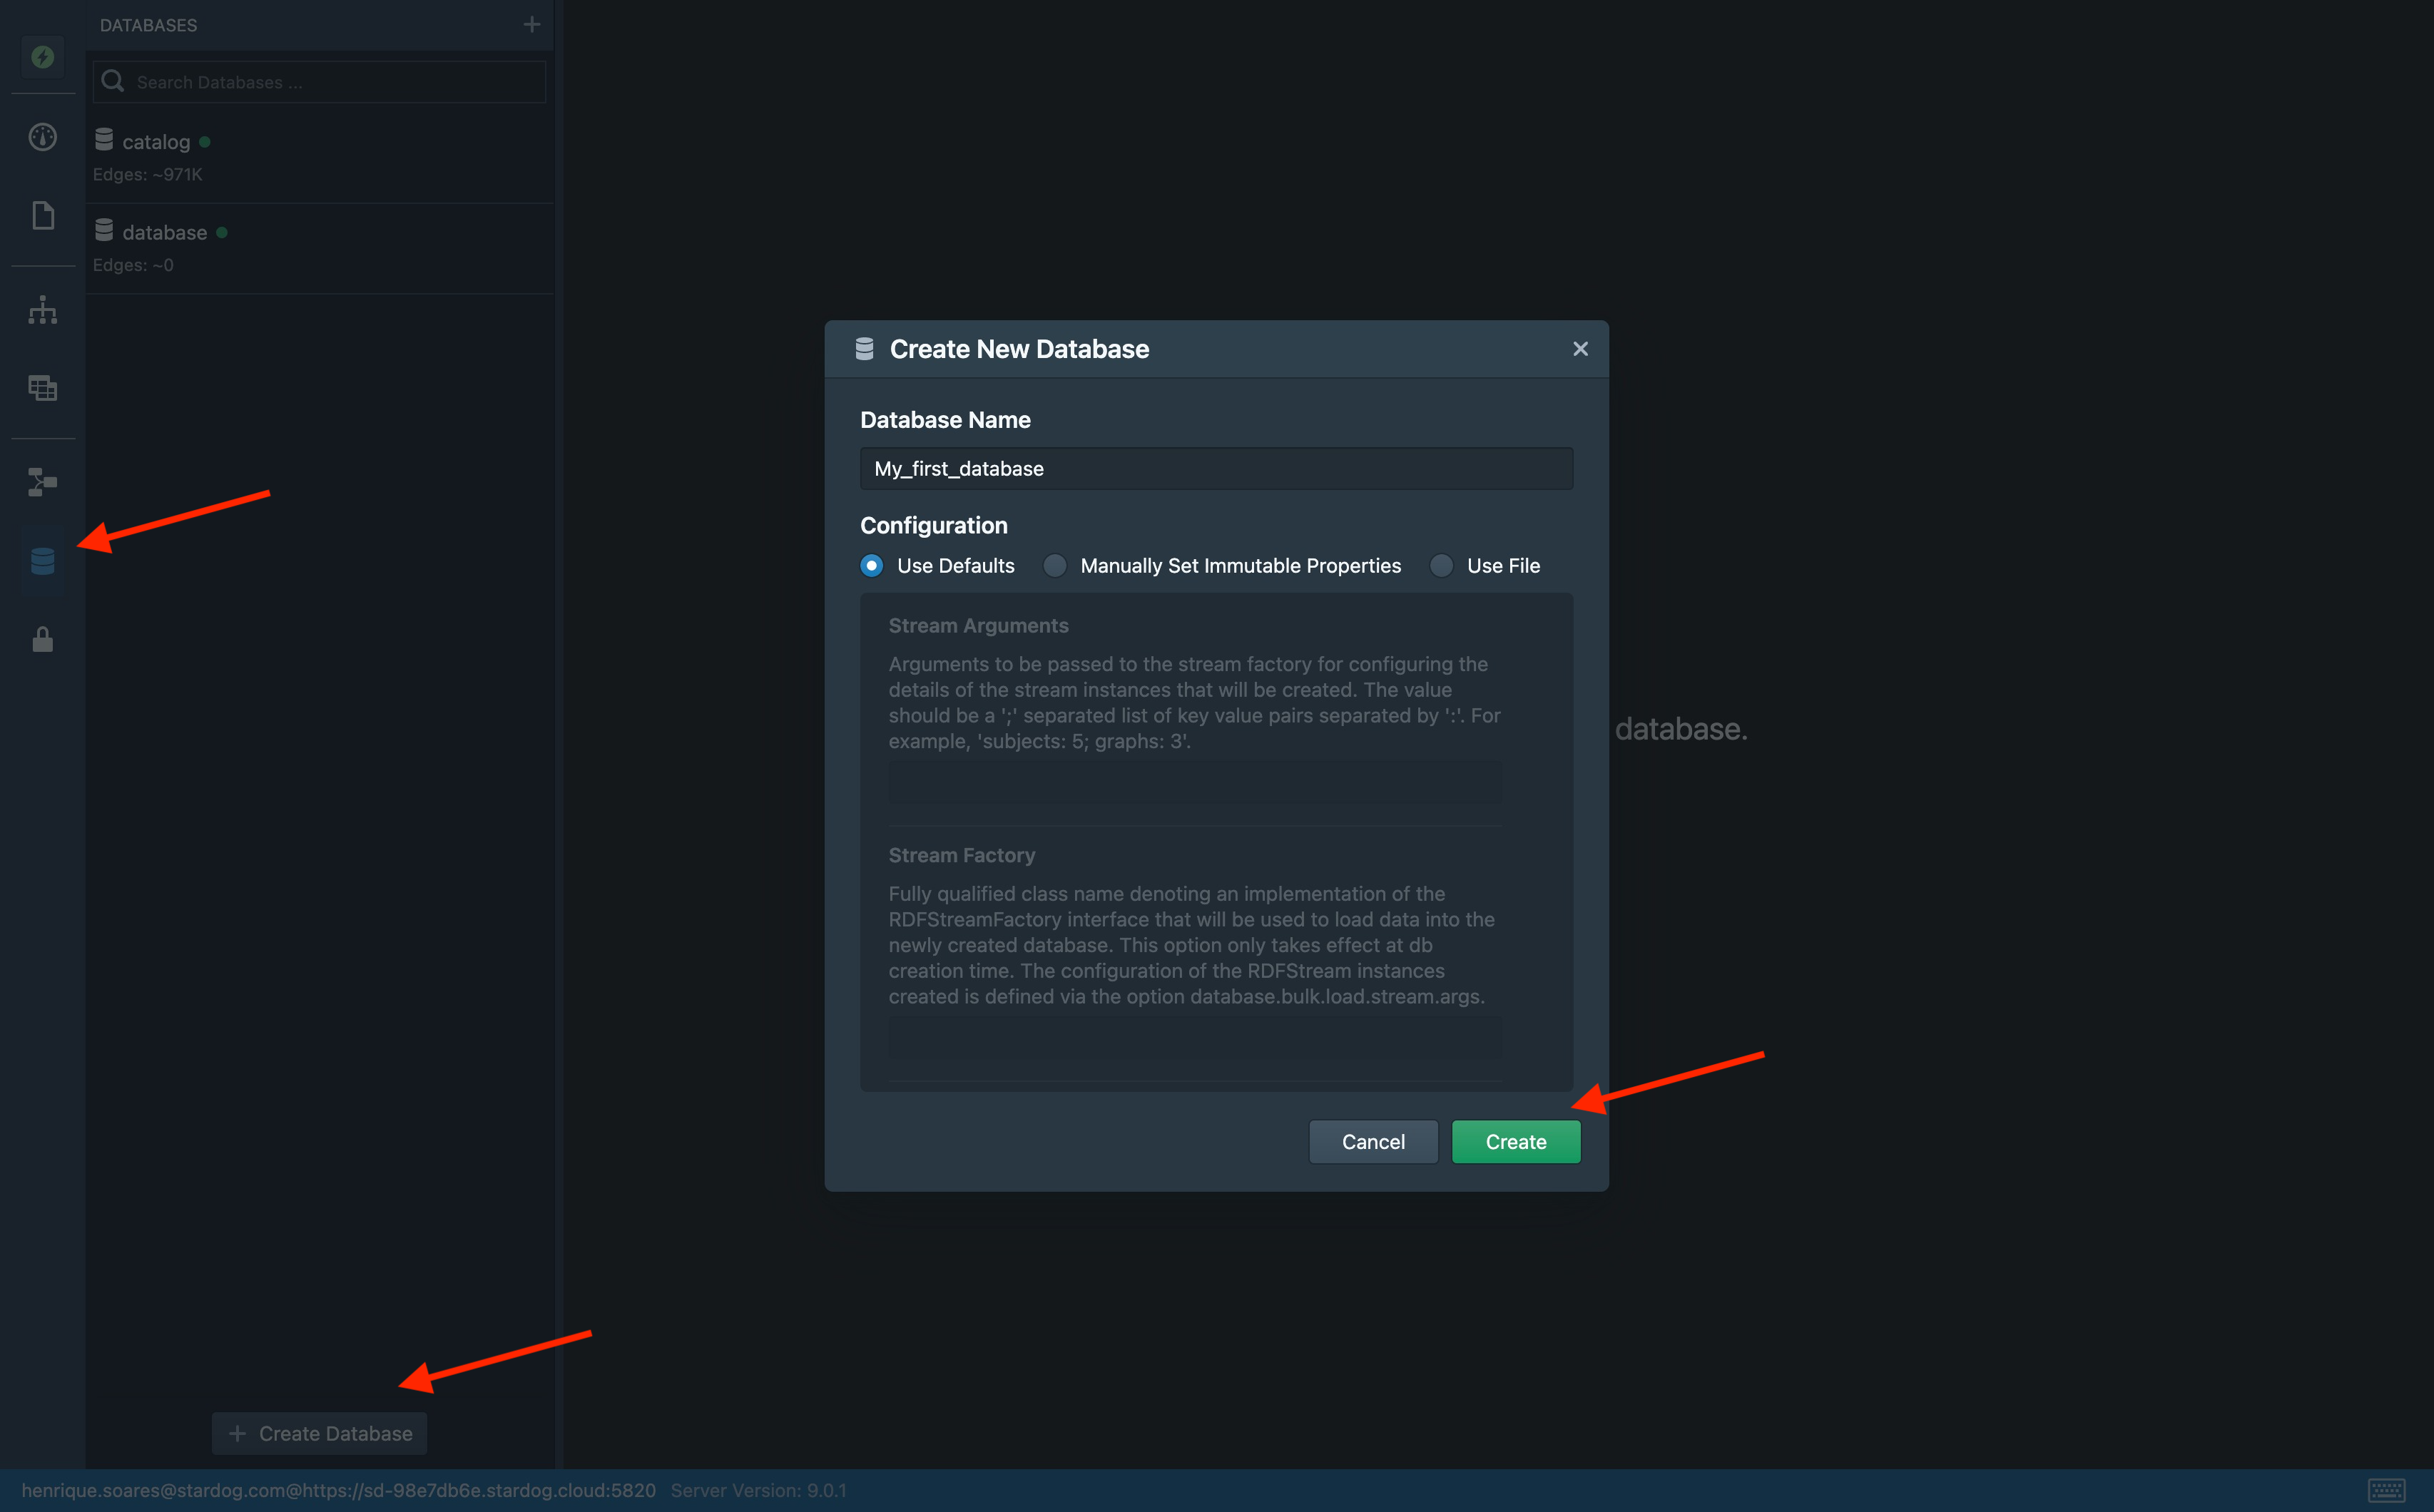
To import a TTL data model in Studio, access Studio, choose the Database tab, click on “Create database” and create a new database. If you already have a database, you can skip this step.
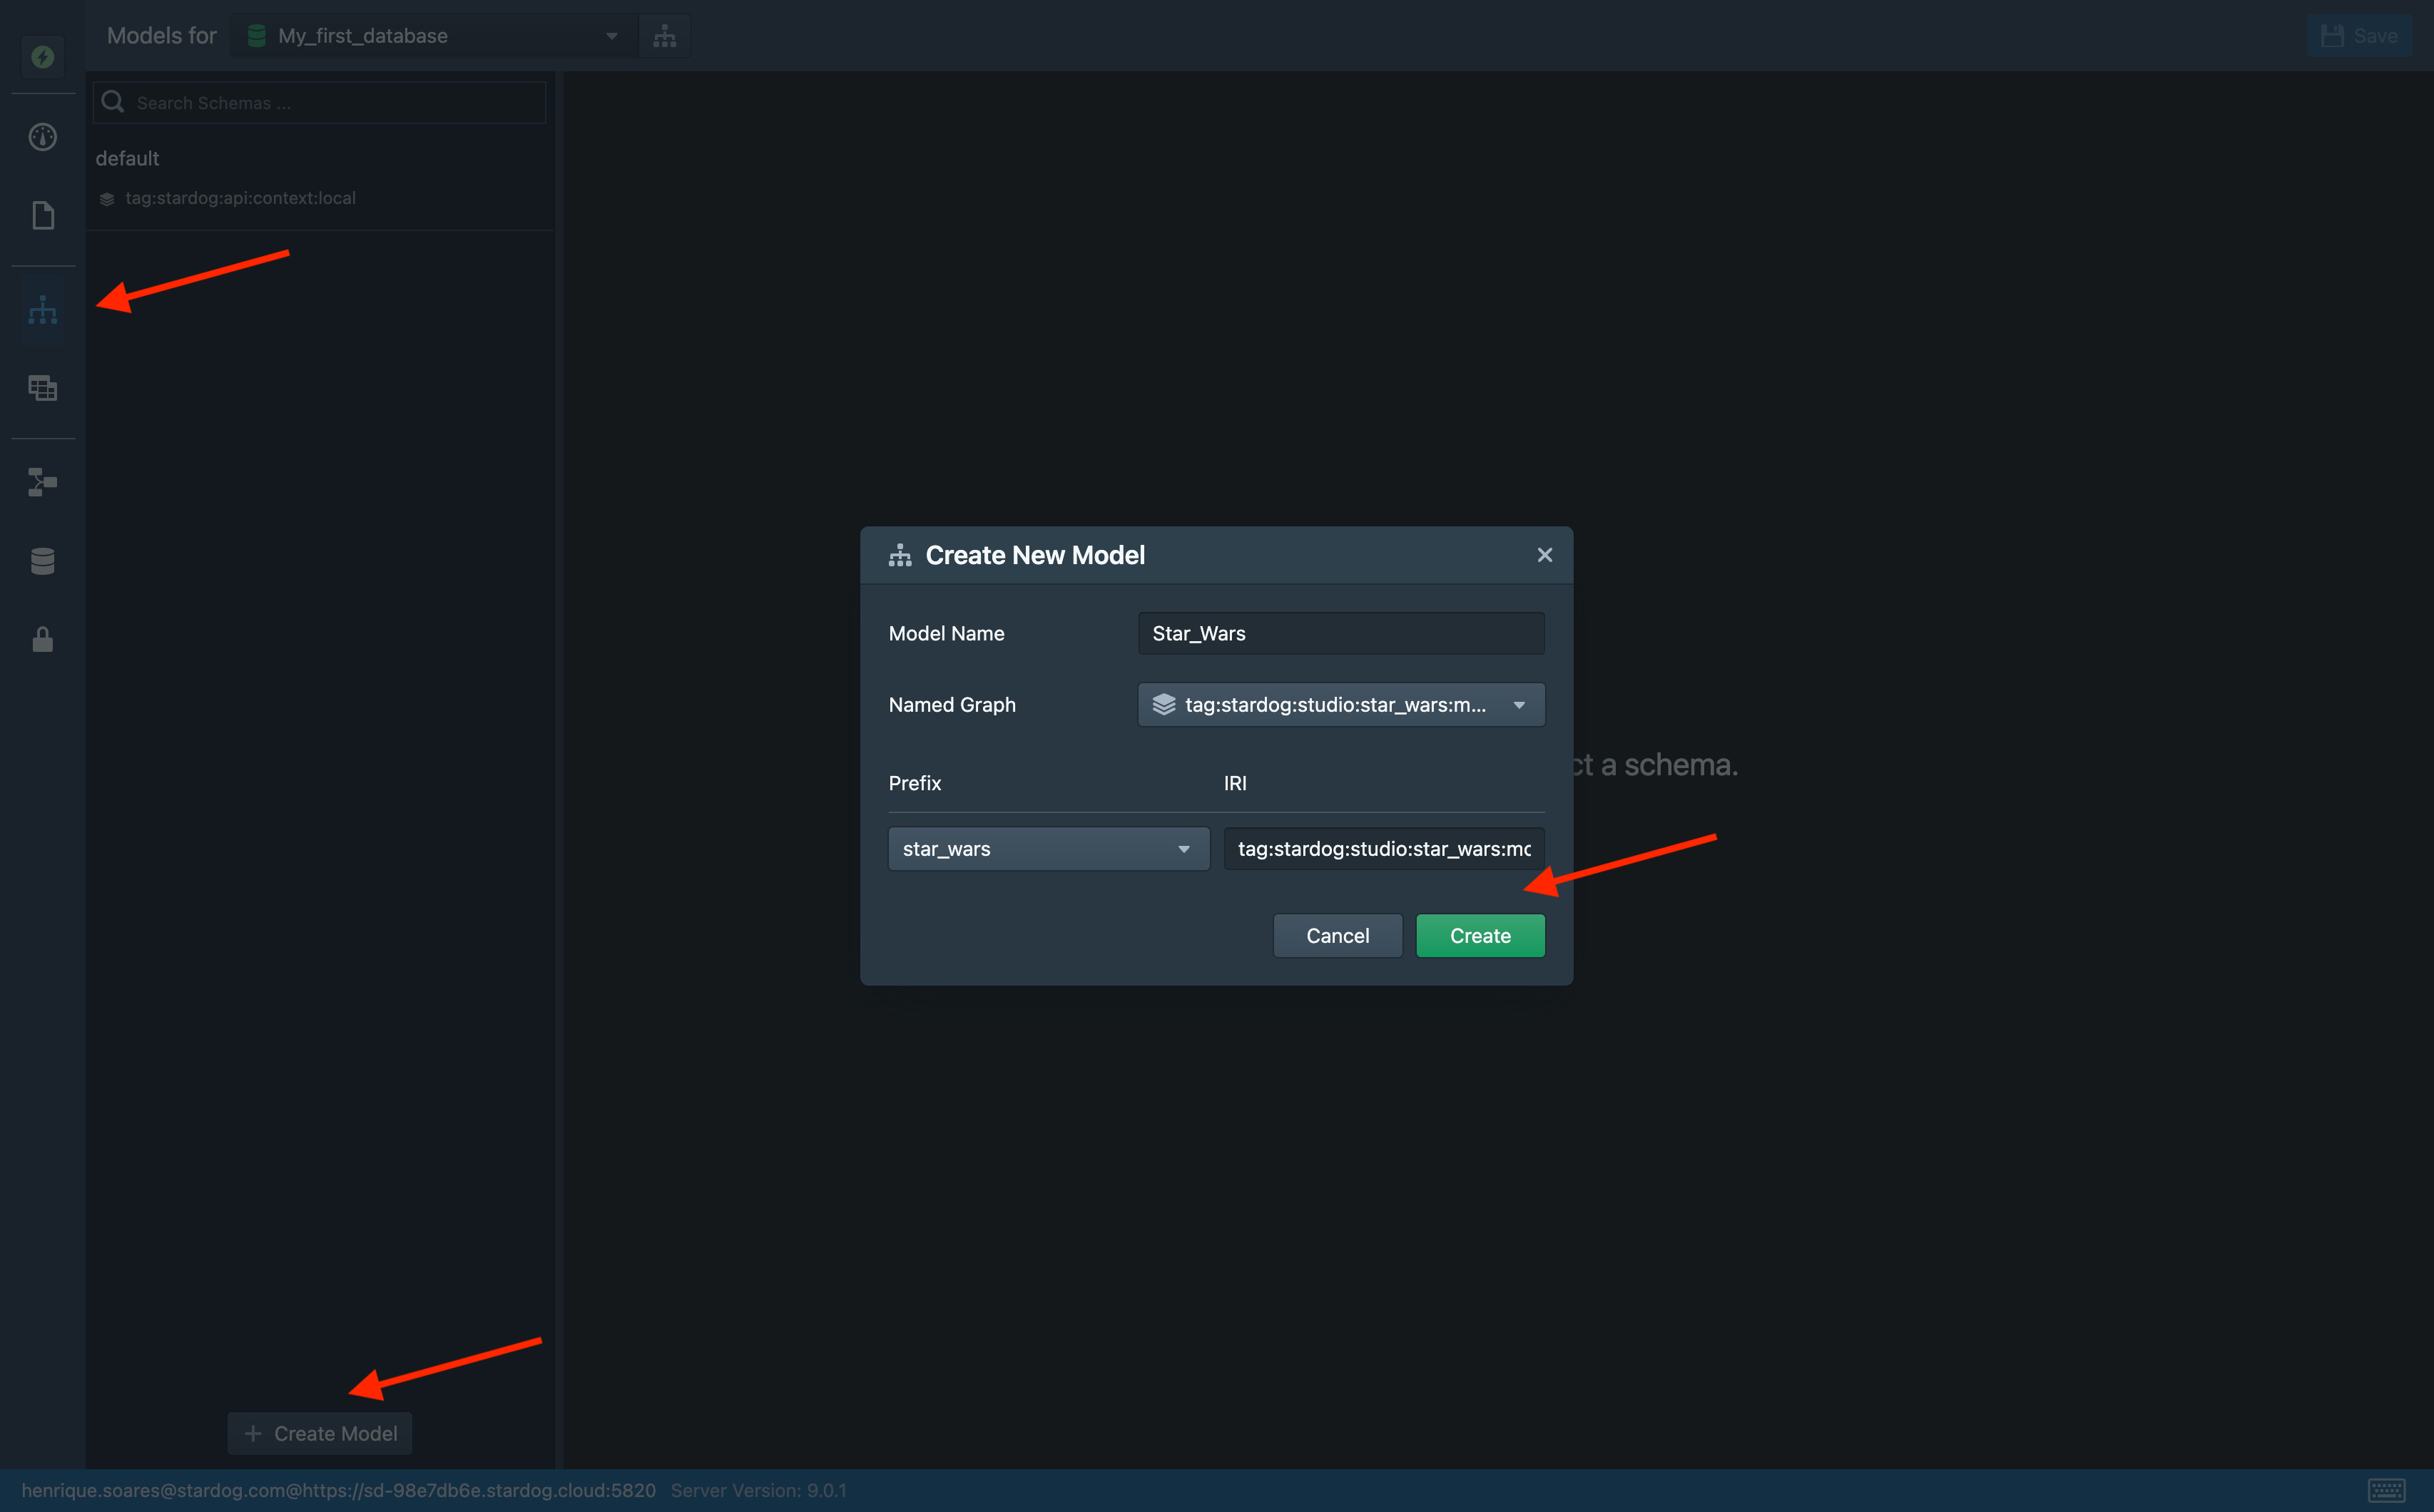
Then, switch to the Models tab, click on “Create Model” and fill out the required fields. Our recommendations for defaults are:
- Model Name: [Model Name]
- Named Graph:
tag:stardog:studio:[Model Name]:model - Prefix =
[Model Name] - IRI =
tag:stardog:studio:[Model Name]:model:
The following characters are not supported within Named Graph, Prefix, or IRI definitions: space, <, >, backquote, ^ , {, }, \, and |.
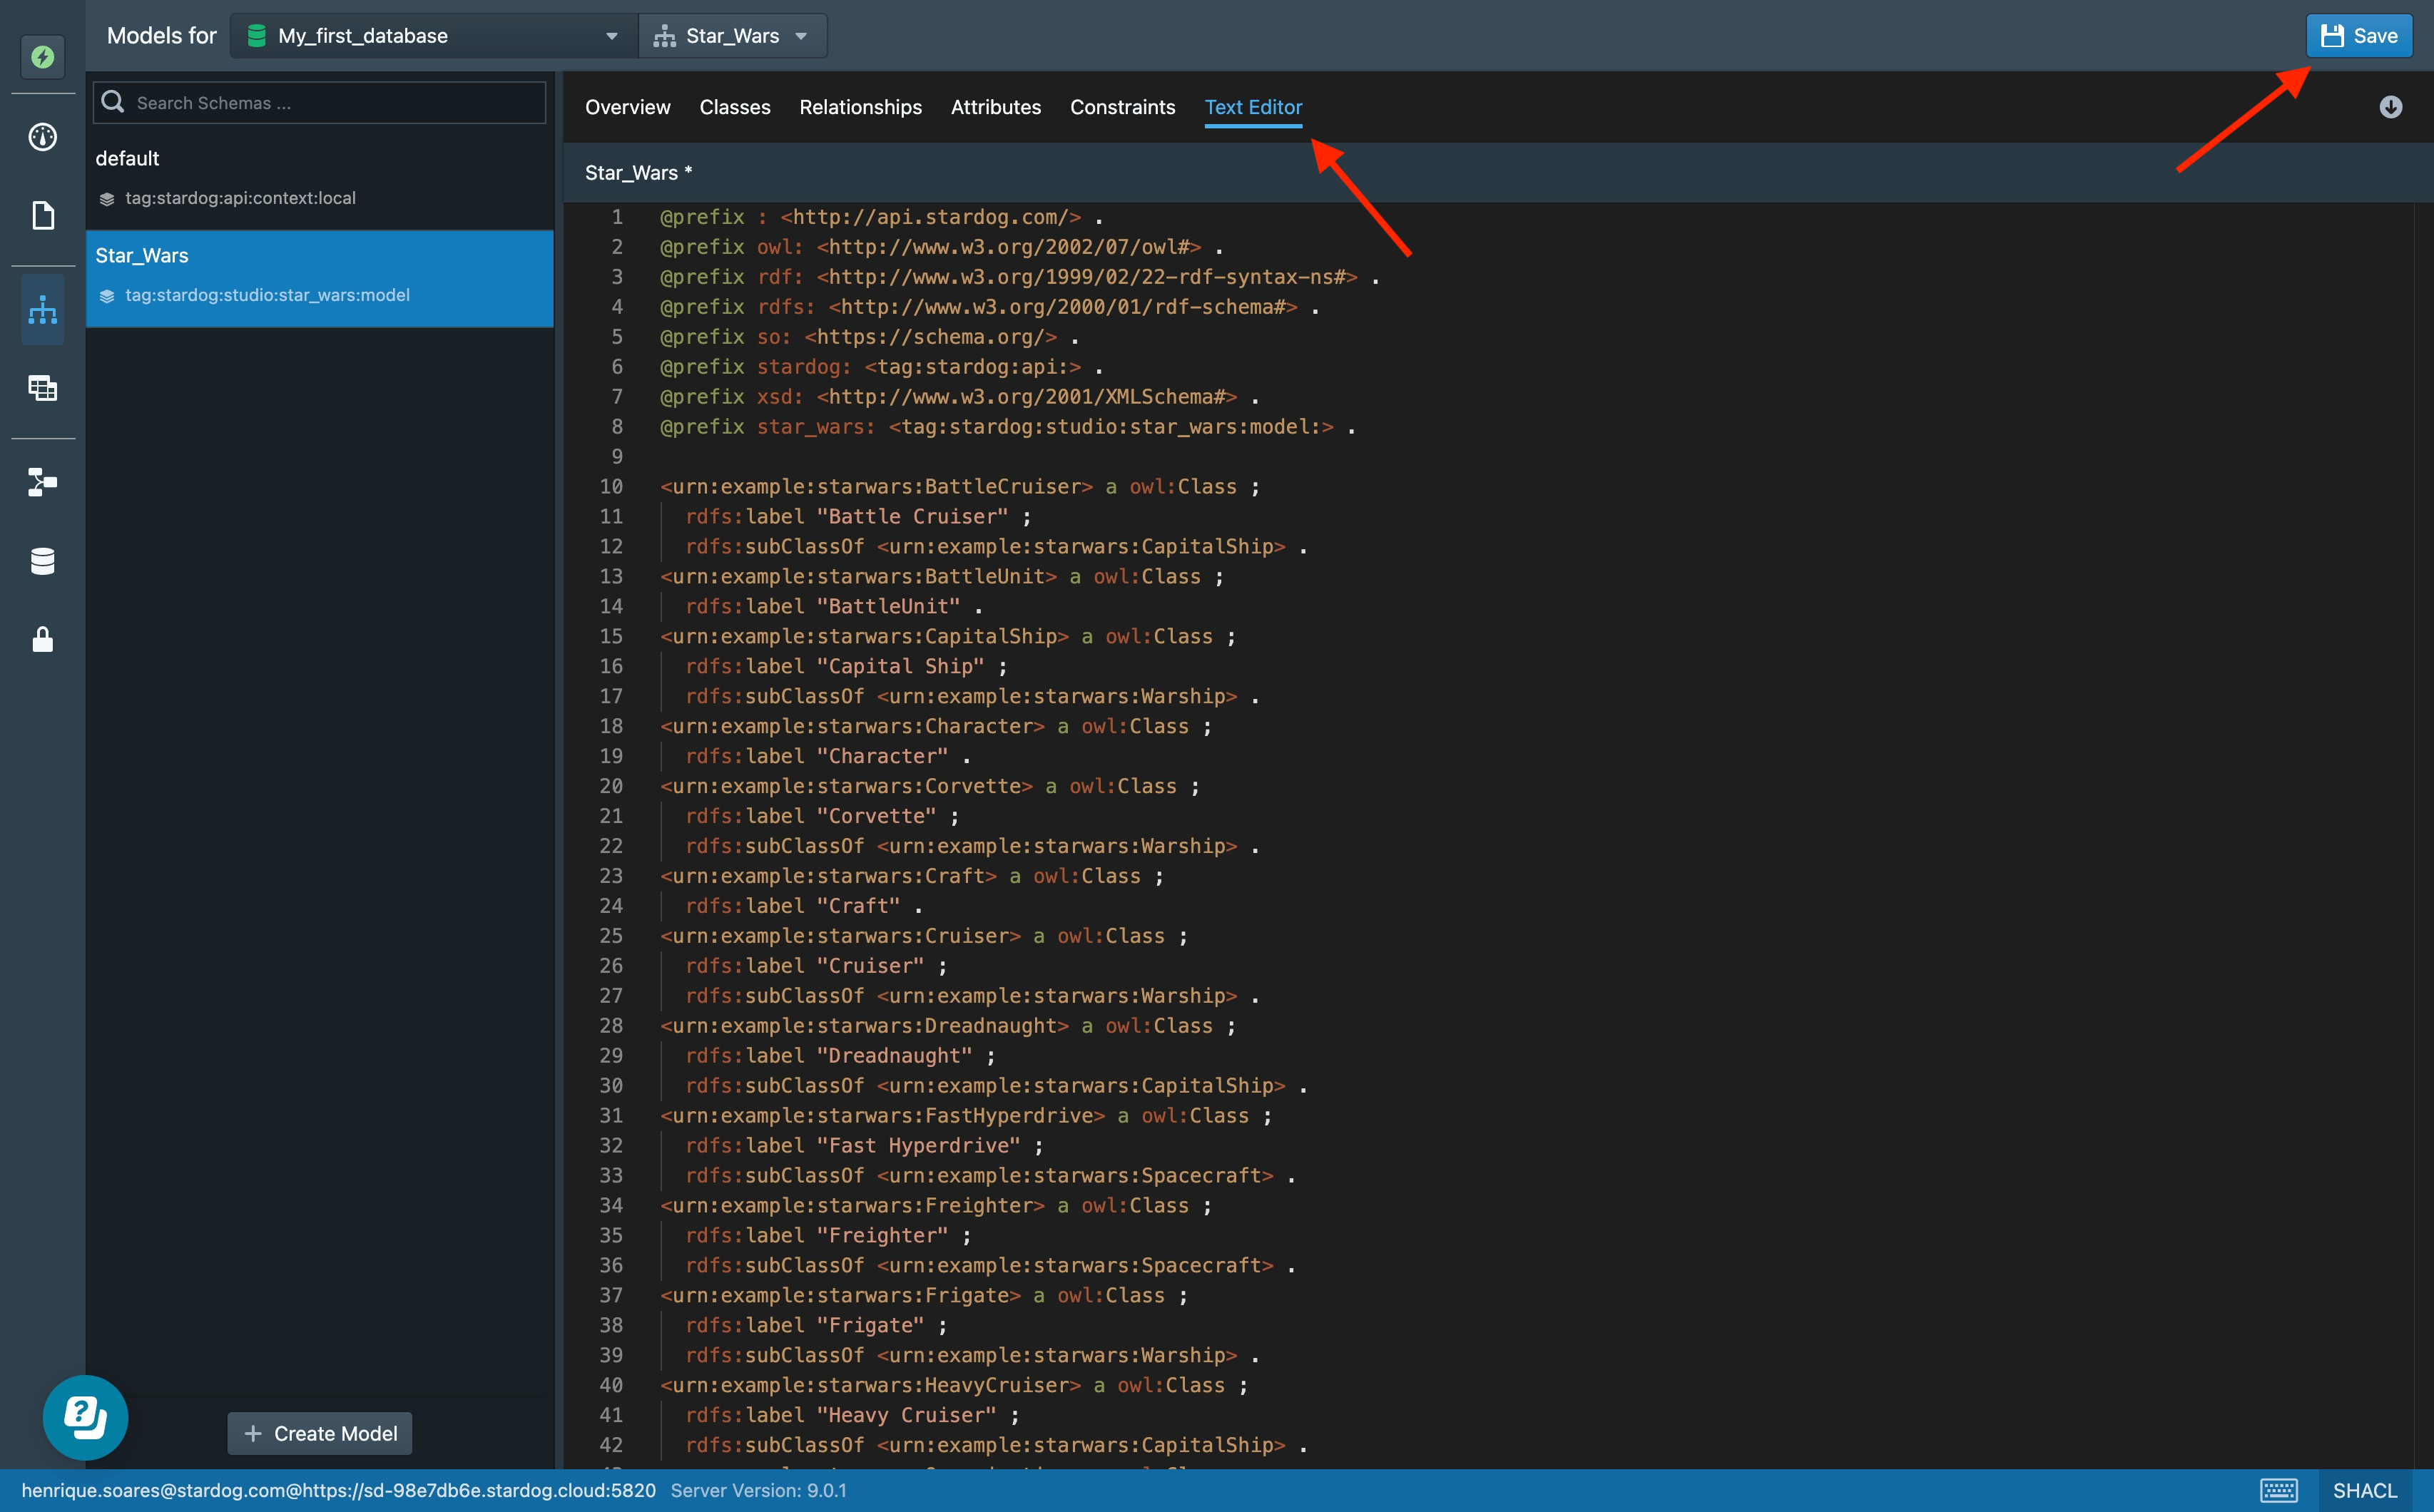
After creating your model, click on the tab “Text editor”, paste your model, and save it.
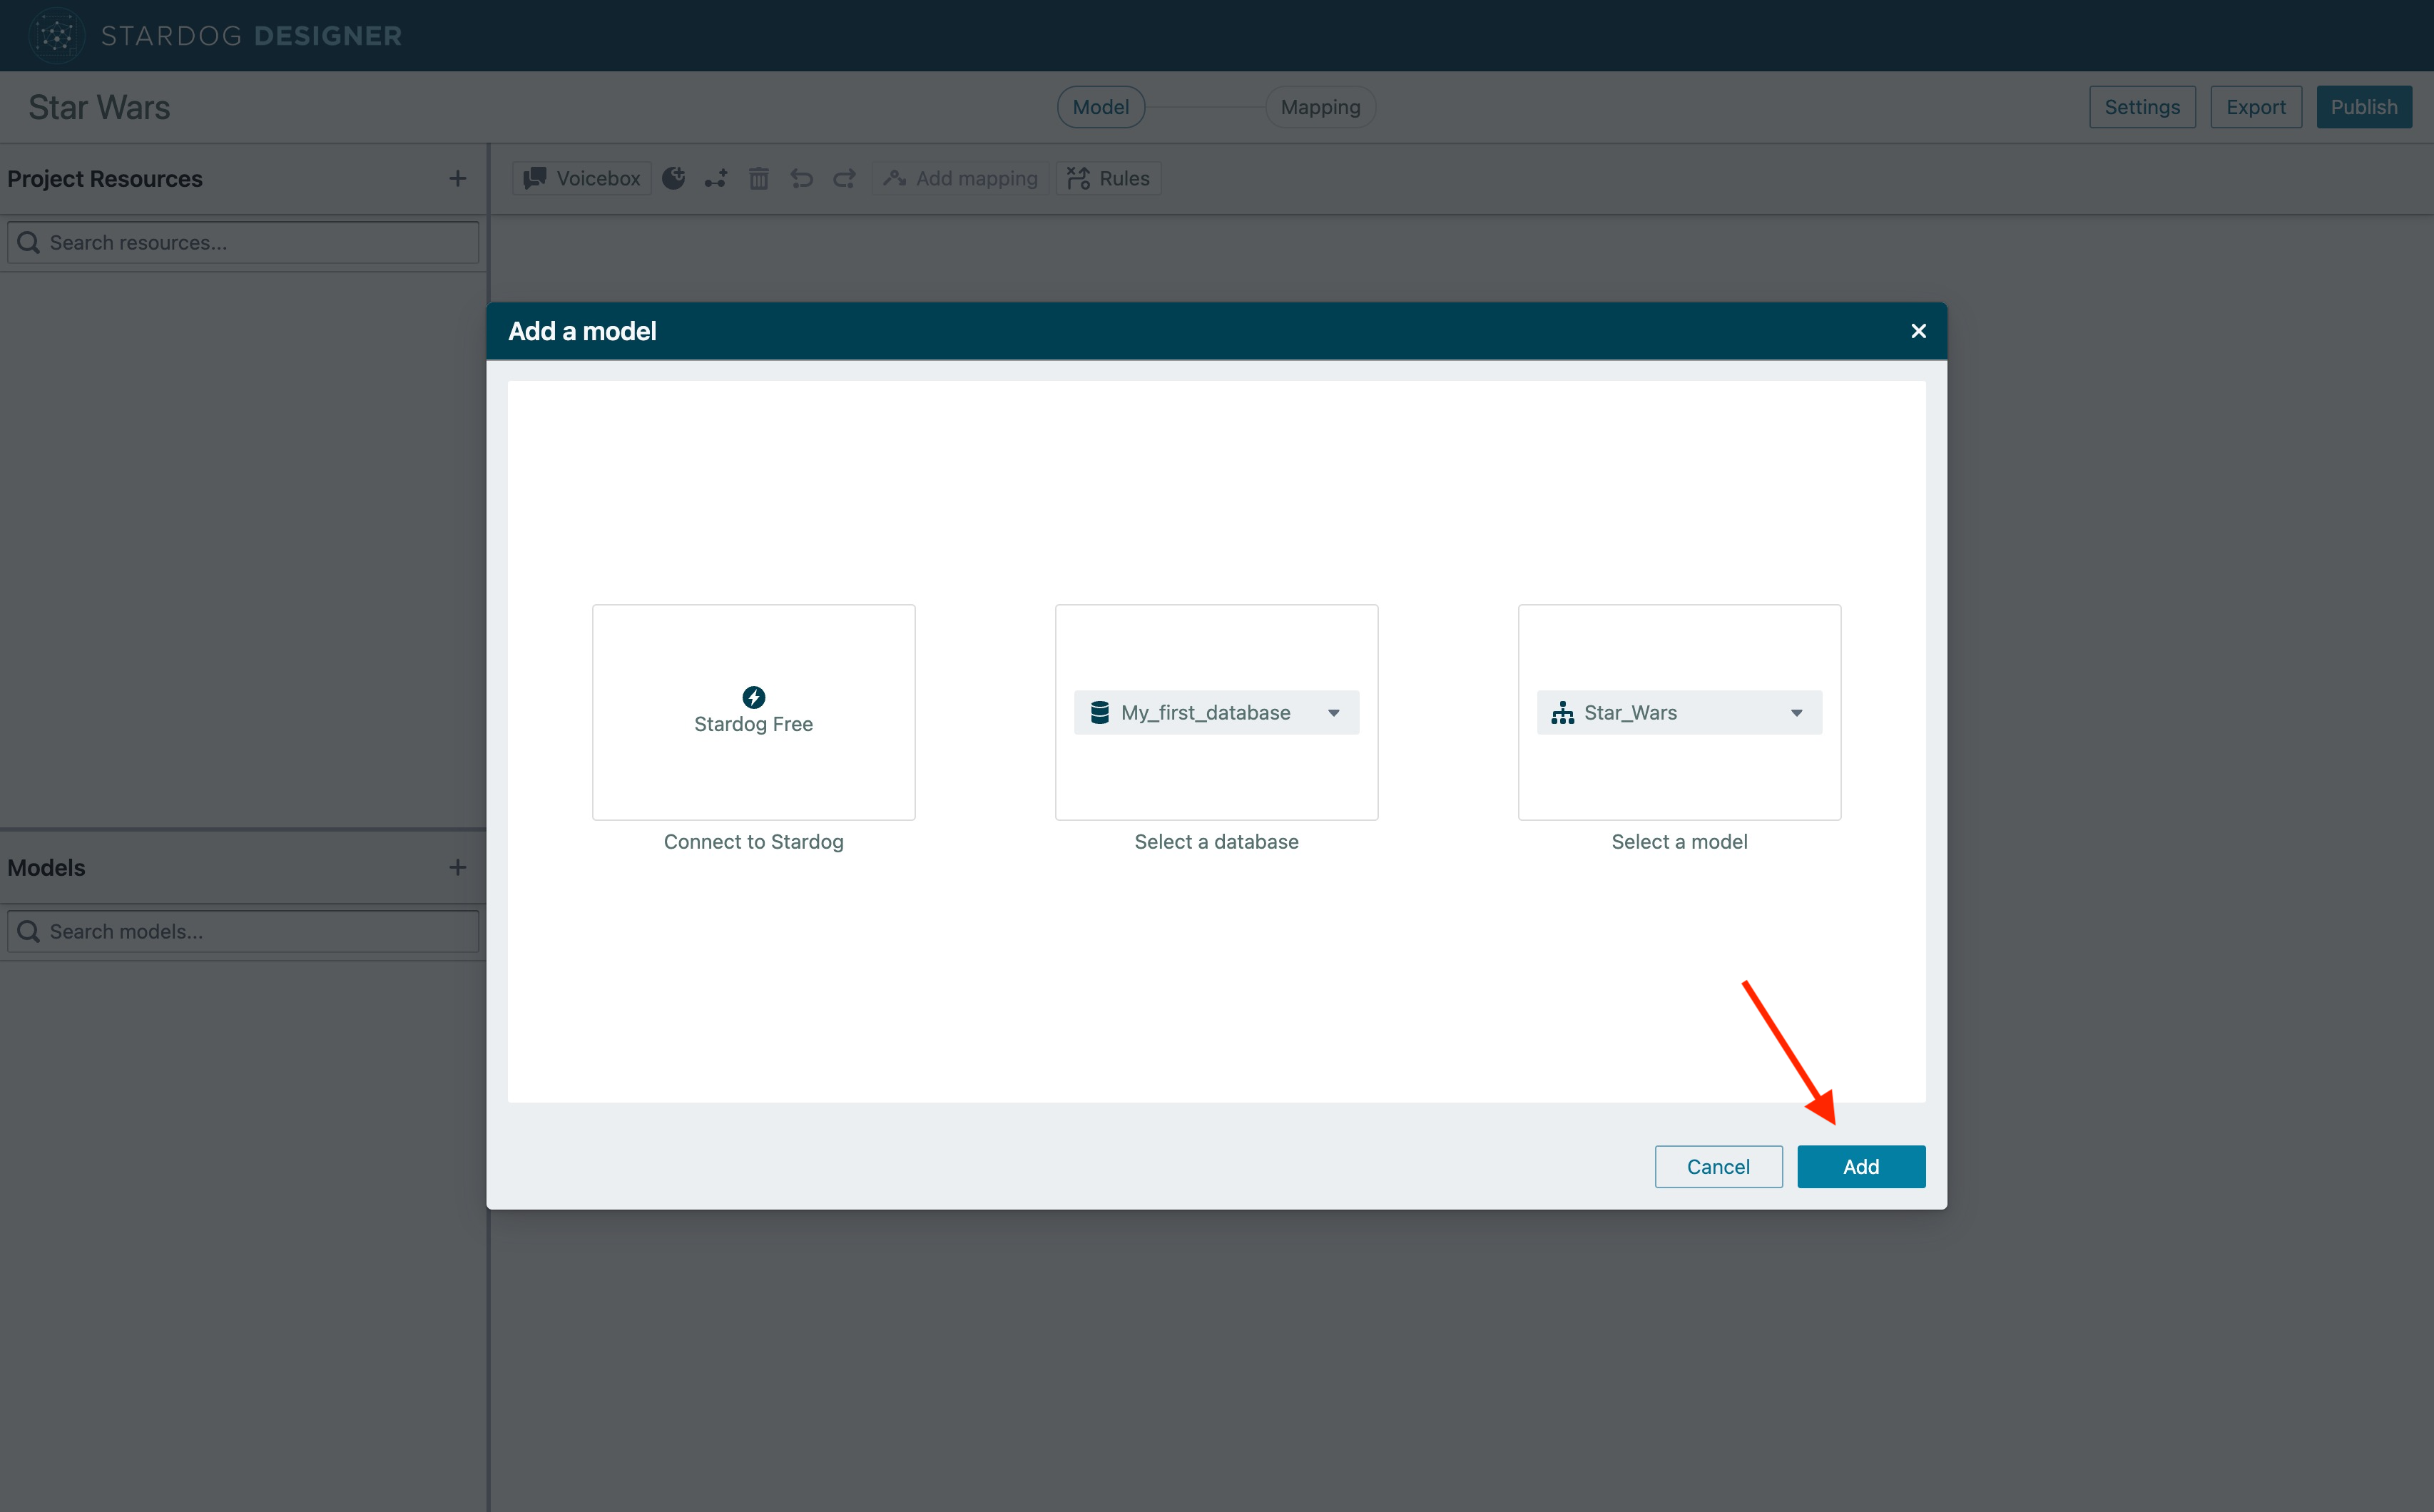
Your model is now ready to use! When creating a project in Designer, select the option “Import a model”; then, select your database and model and click on “Add”.
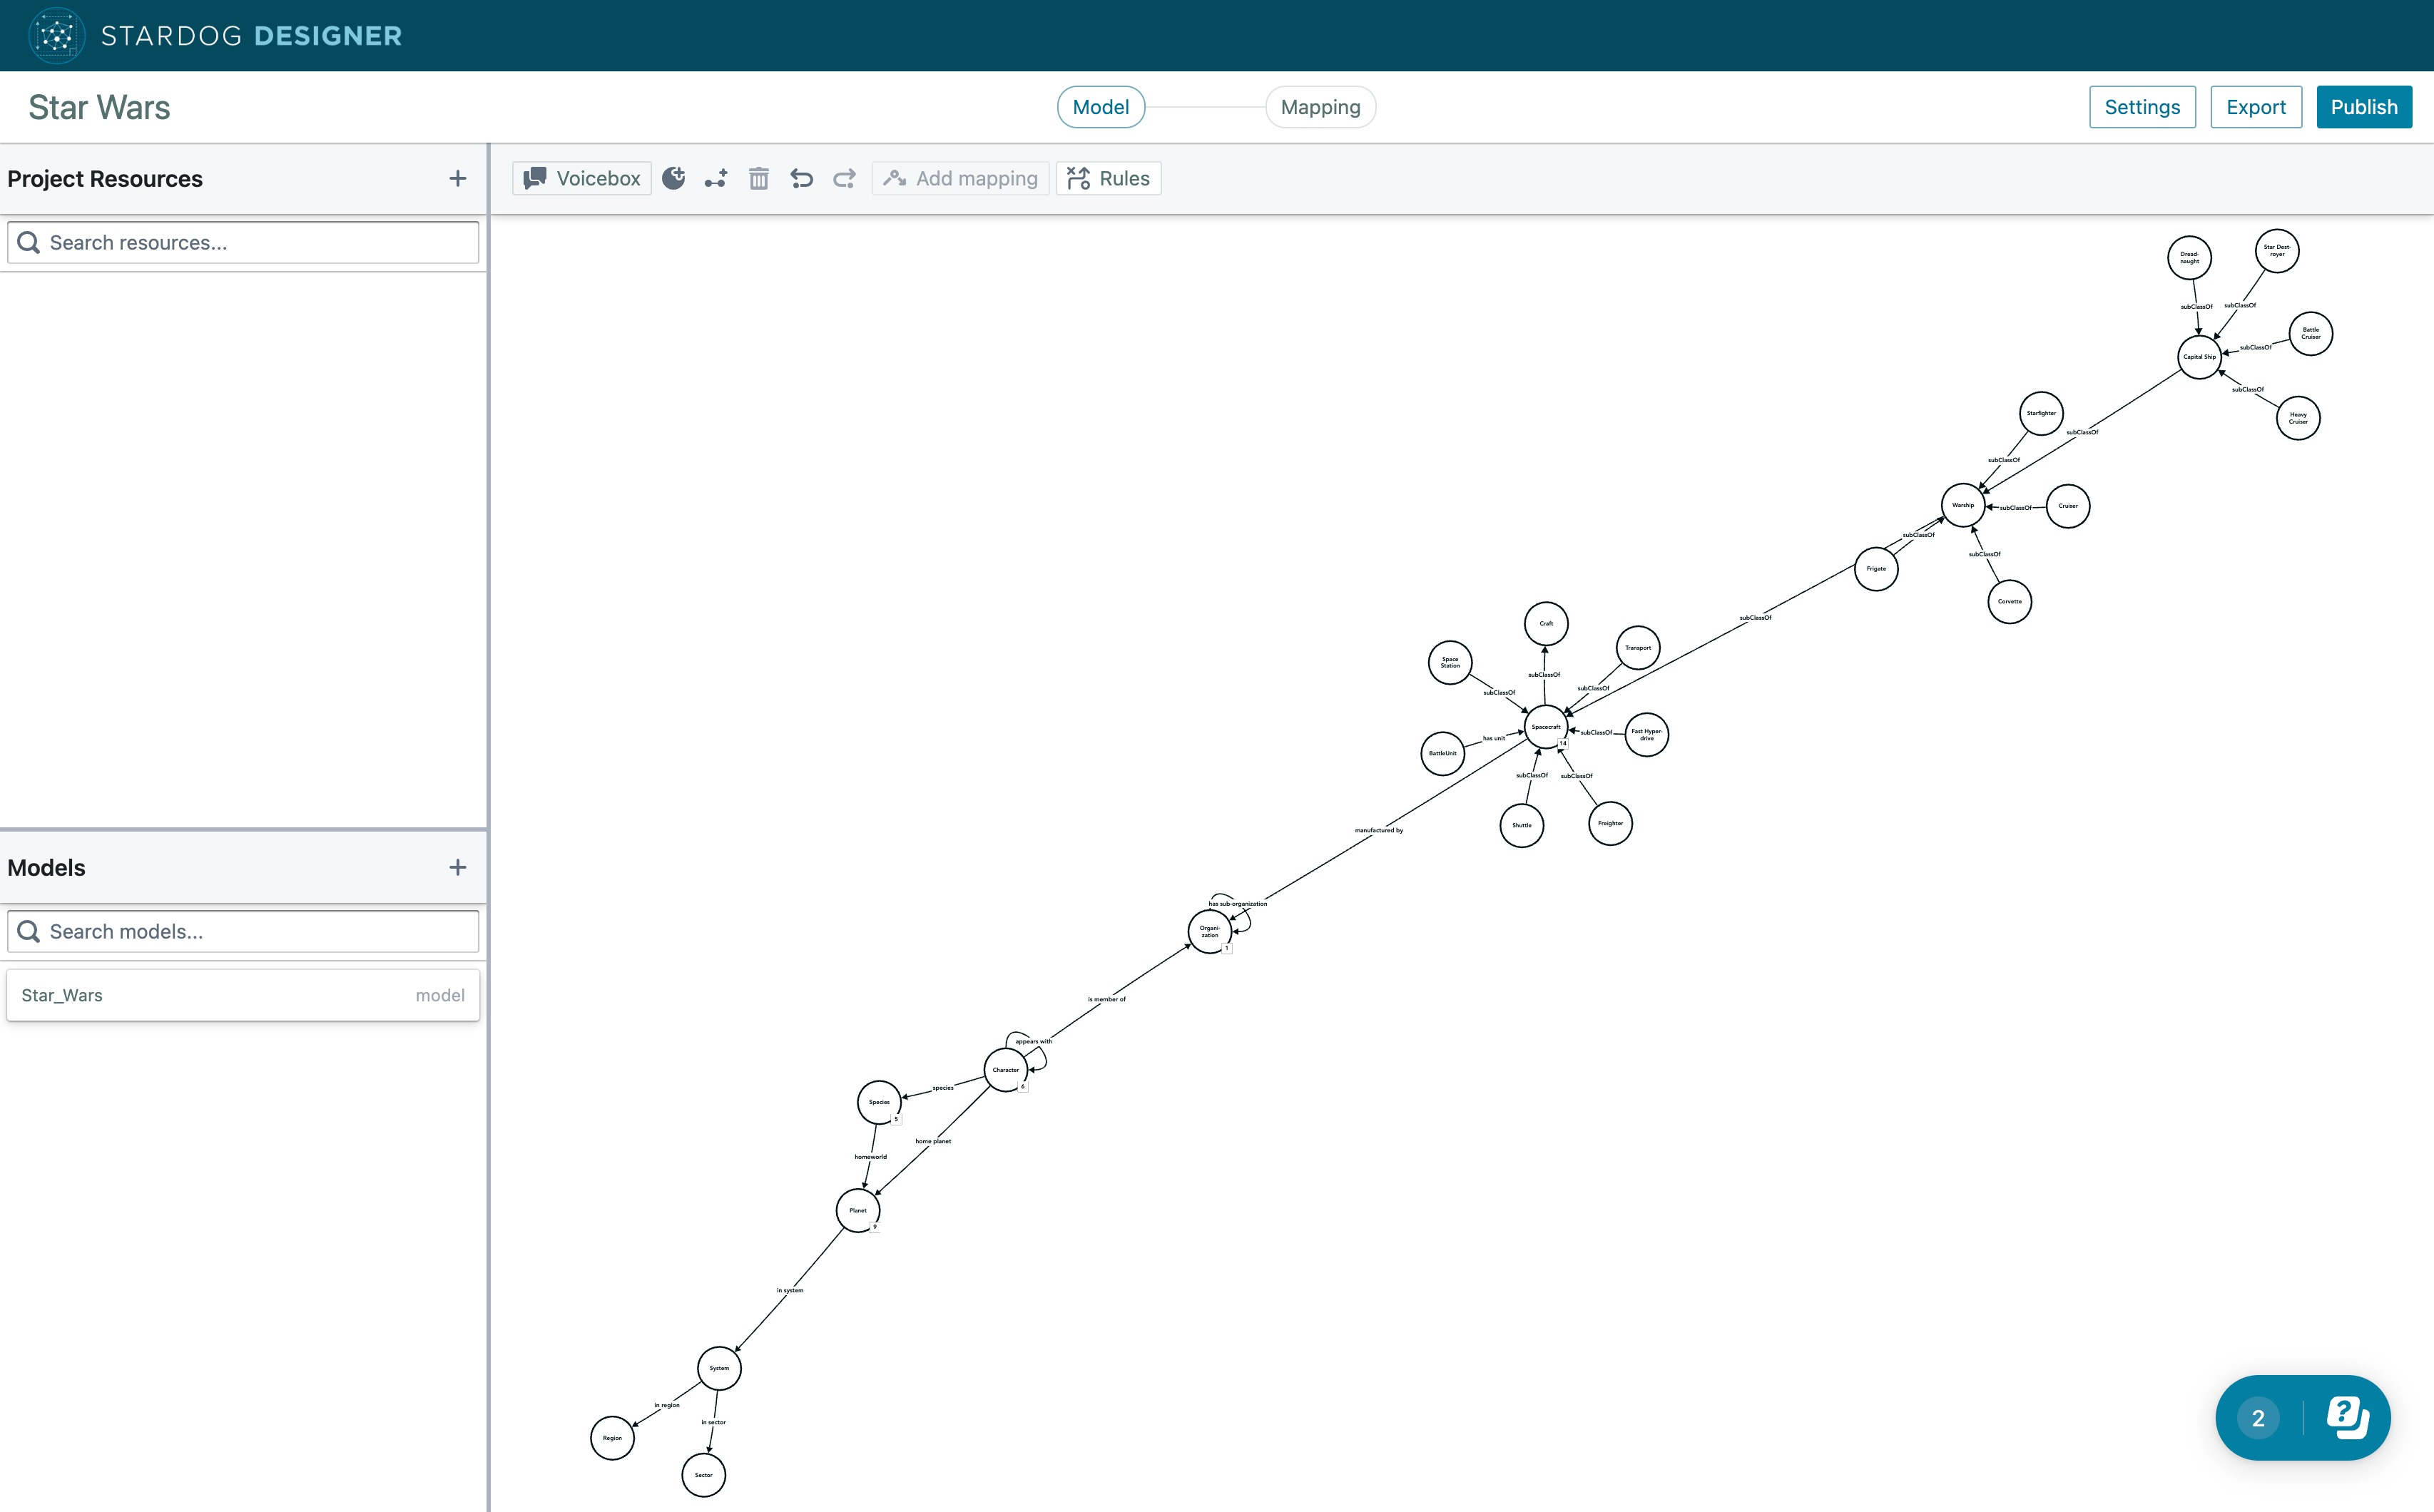
Your model is now imported! Don’t forget to map your project resources by following the instructions on this page. You can also iterate on updates to your data model with new classes, attributes, and relationships.
What’s Next?
Ready for more? To continue on with the Getting Started series, head on over to Getting Started: Part 4.