Databricks Partner Connect
This page descibes how to access Stardog Cloud through Databricks Partner Connect.
Overview
Databricks Partner Connect allows Databricks users to connect to applications hosted by Databricks partners, such as Stardog.
Prerequisites
You must meet these Databricks-specific requirements:
-
Your Databricks account must be on the Premium or Enterprise Plan.
-
Your Databricks workspace must be on the E2 version of the Databricks platform.
-
To create a new connection to a Stardog endpoint, you must first sign in to your workspace as a Databricks workspace admin.
-
For all other Partner Connect tasks, you must first sign in to your workspace as a Databricks workspace admin or a Databricks user who has at least the Workspace access entitlement. You also need the Databricks SQL access entitlement.
Navigating Databricks
-
From the Databricks home page, log in to your workspace.
-
From the Workspaces view, open a workspace.

-
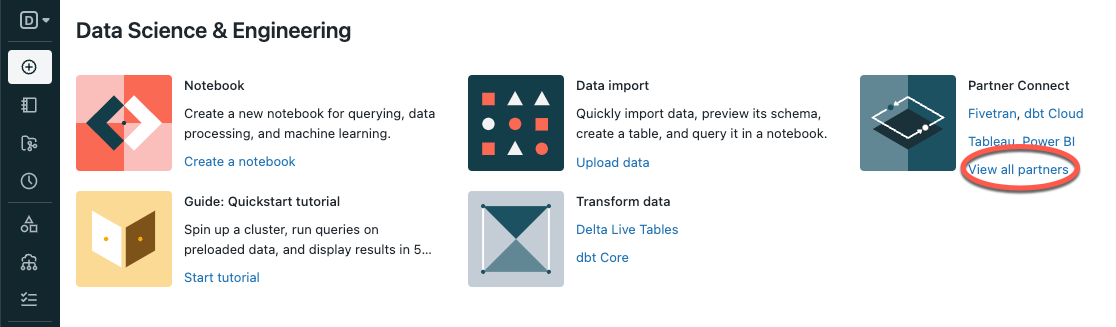
Under Partner Connect, click View all partners.
-
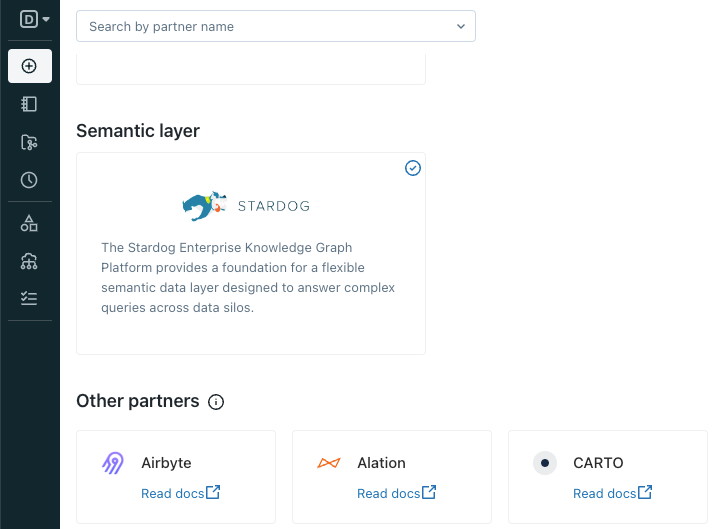
Navigate to Stardog (under Semantic layer).
-
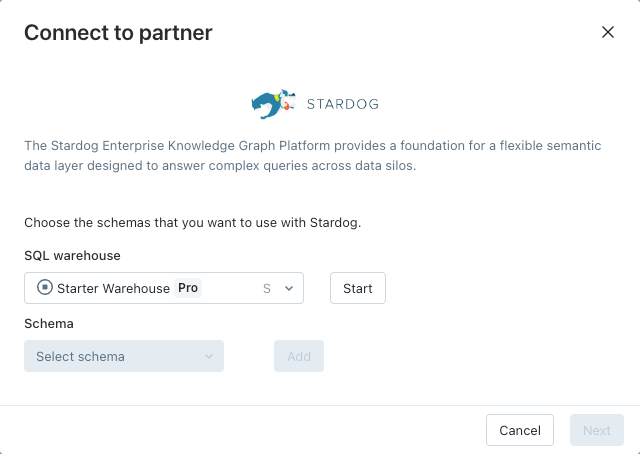
Select a SQL warehouse and click Start. If there are no SQL warehouses in your workspace, follow step 4 from this guide.
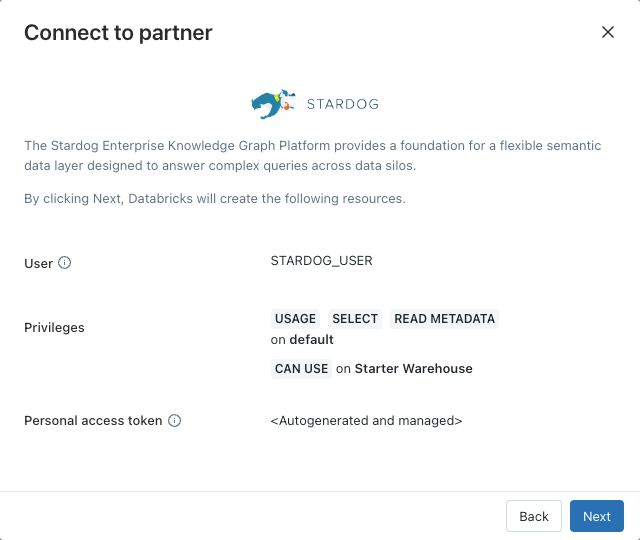
-
Select a catalog and a schema from the drop-down lists, then click Add. You can repeat this step to add multiple schemas. Click Next.
-
Click Next on the subsequent screen.
-
The Email box displays the email address for your Databricks account. Stardog uses this email address to prompt you to either create a Stardog account or sign in to your existing Stardog account.
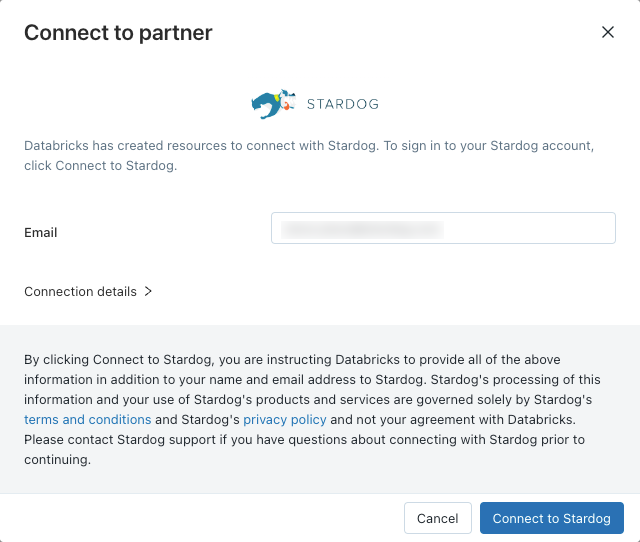
-
Click Connect to Stardog. A new tab will open which displays Stardog Cloud.
Using Stardog Cloud
-
If this is your first time logging into your Stardog Cloud account, follow the prompt to update your Stardog profile. Check the boxes to agree to the Stardog terms of use and privacy policy, then click Update.

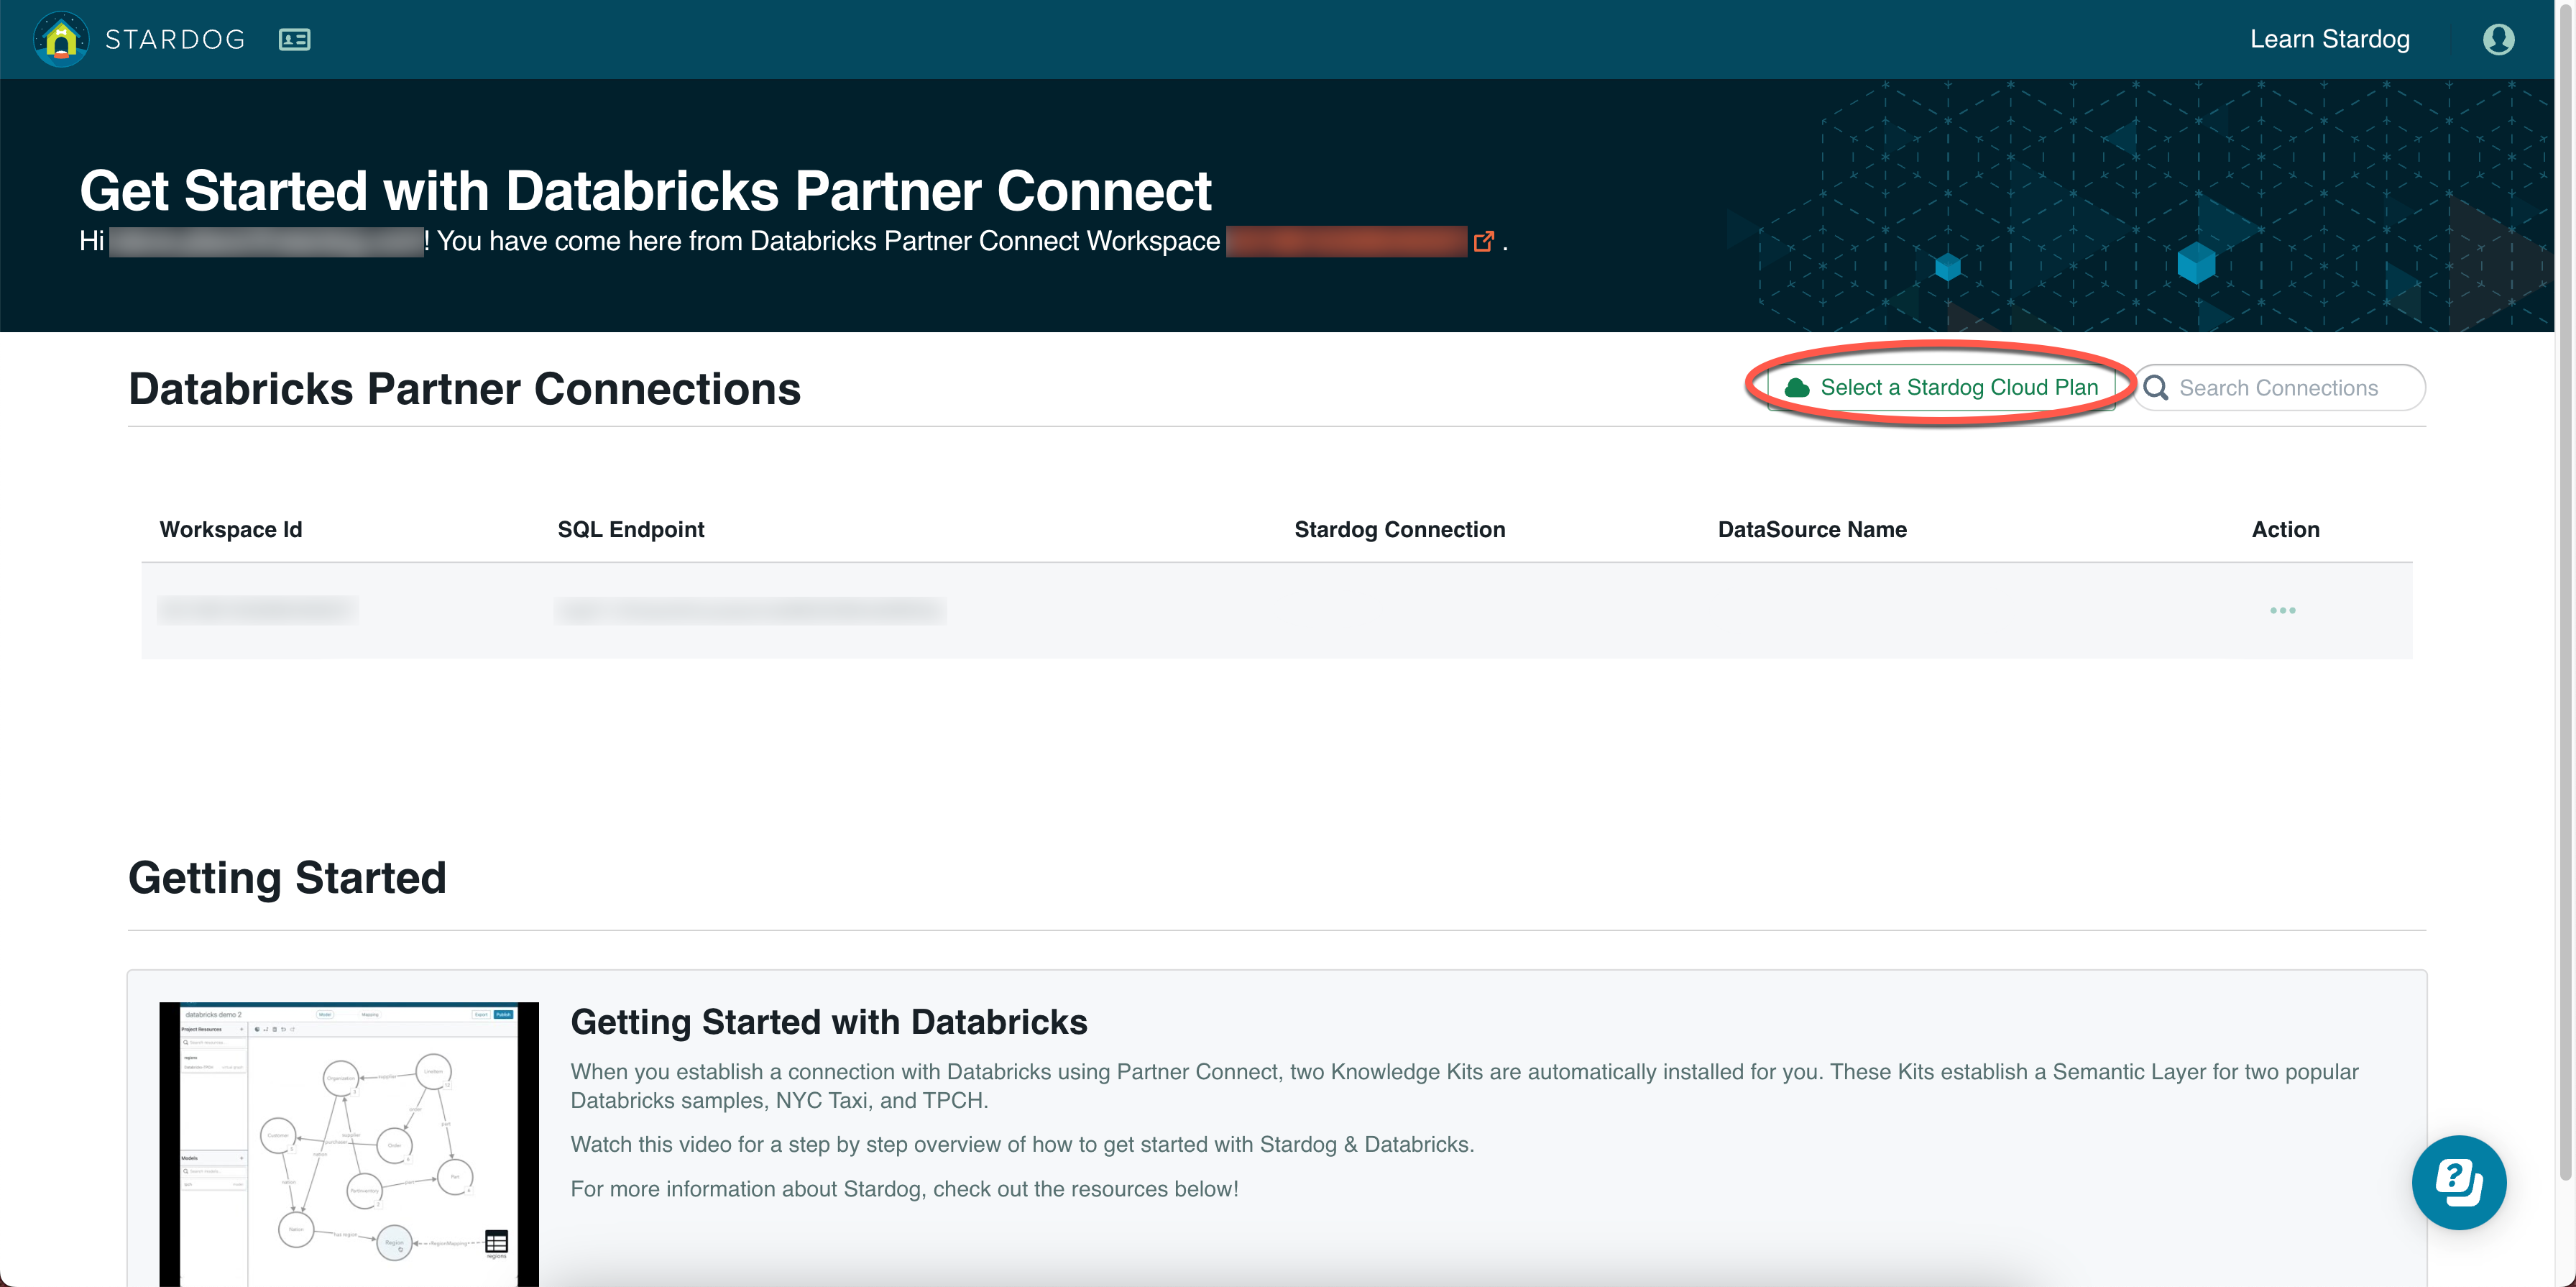
-
Click Select a Stardog Cloud Plan.
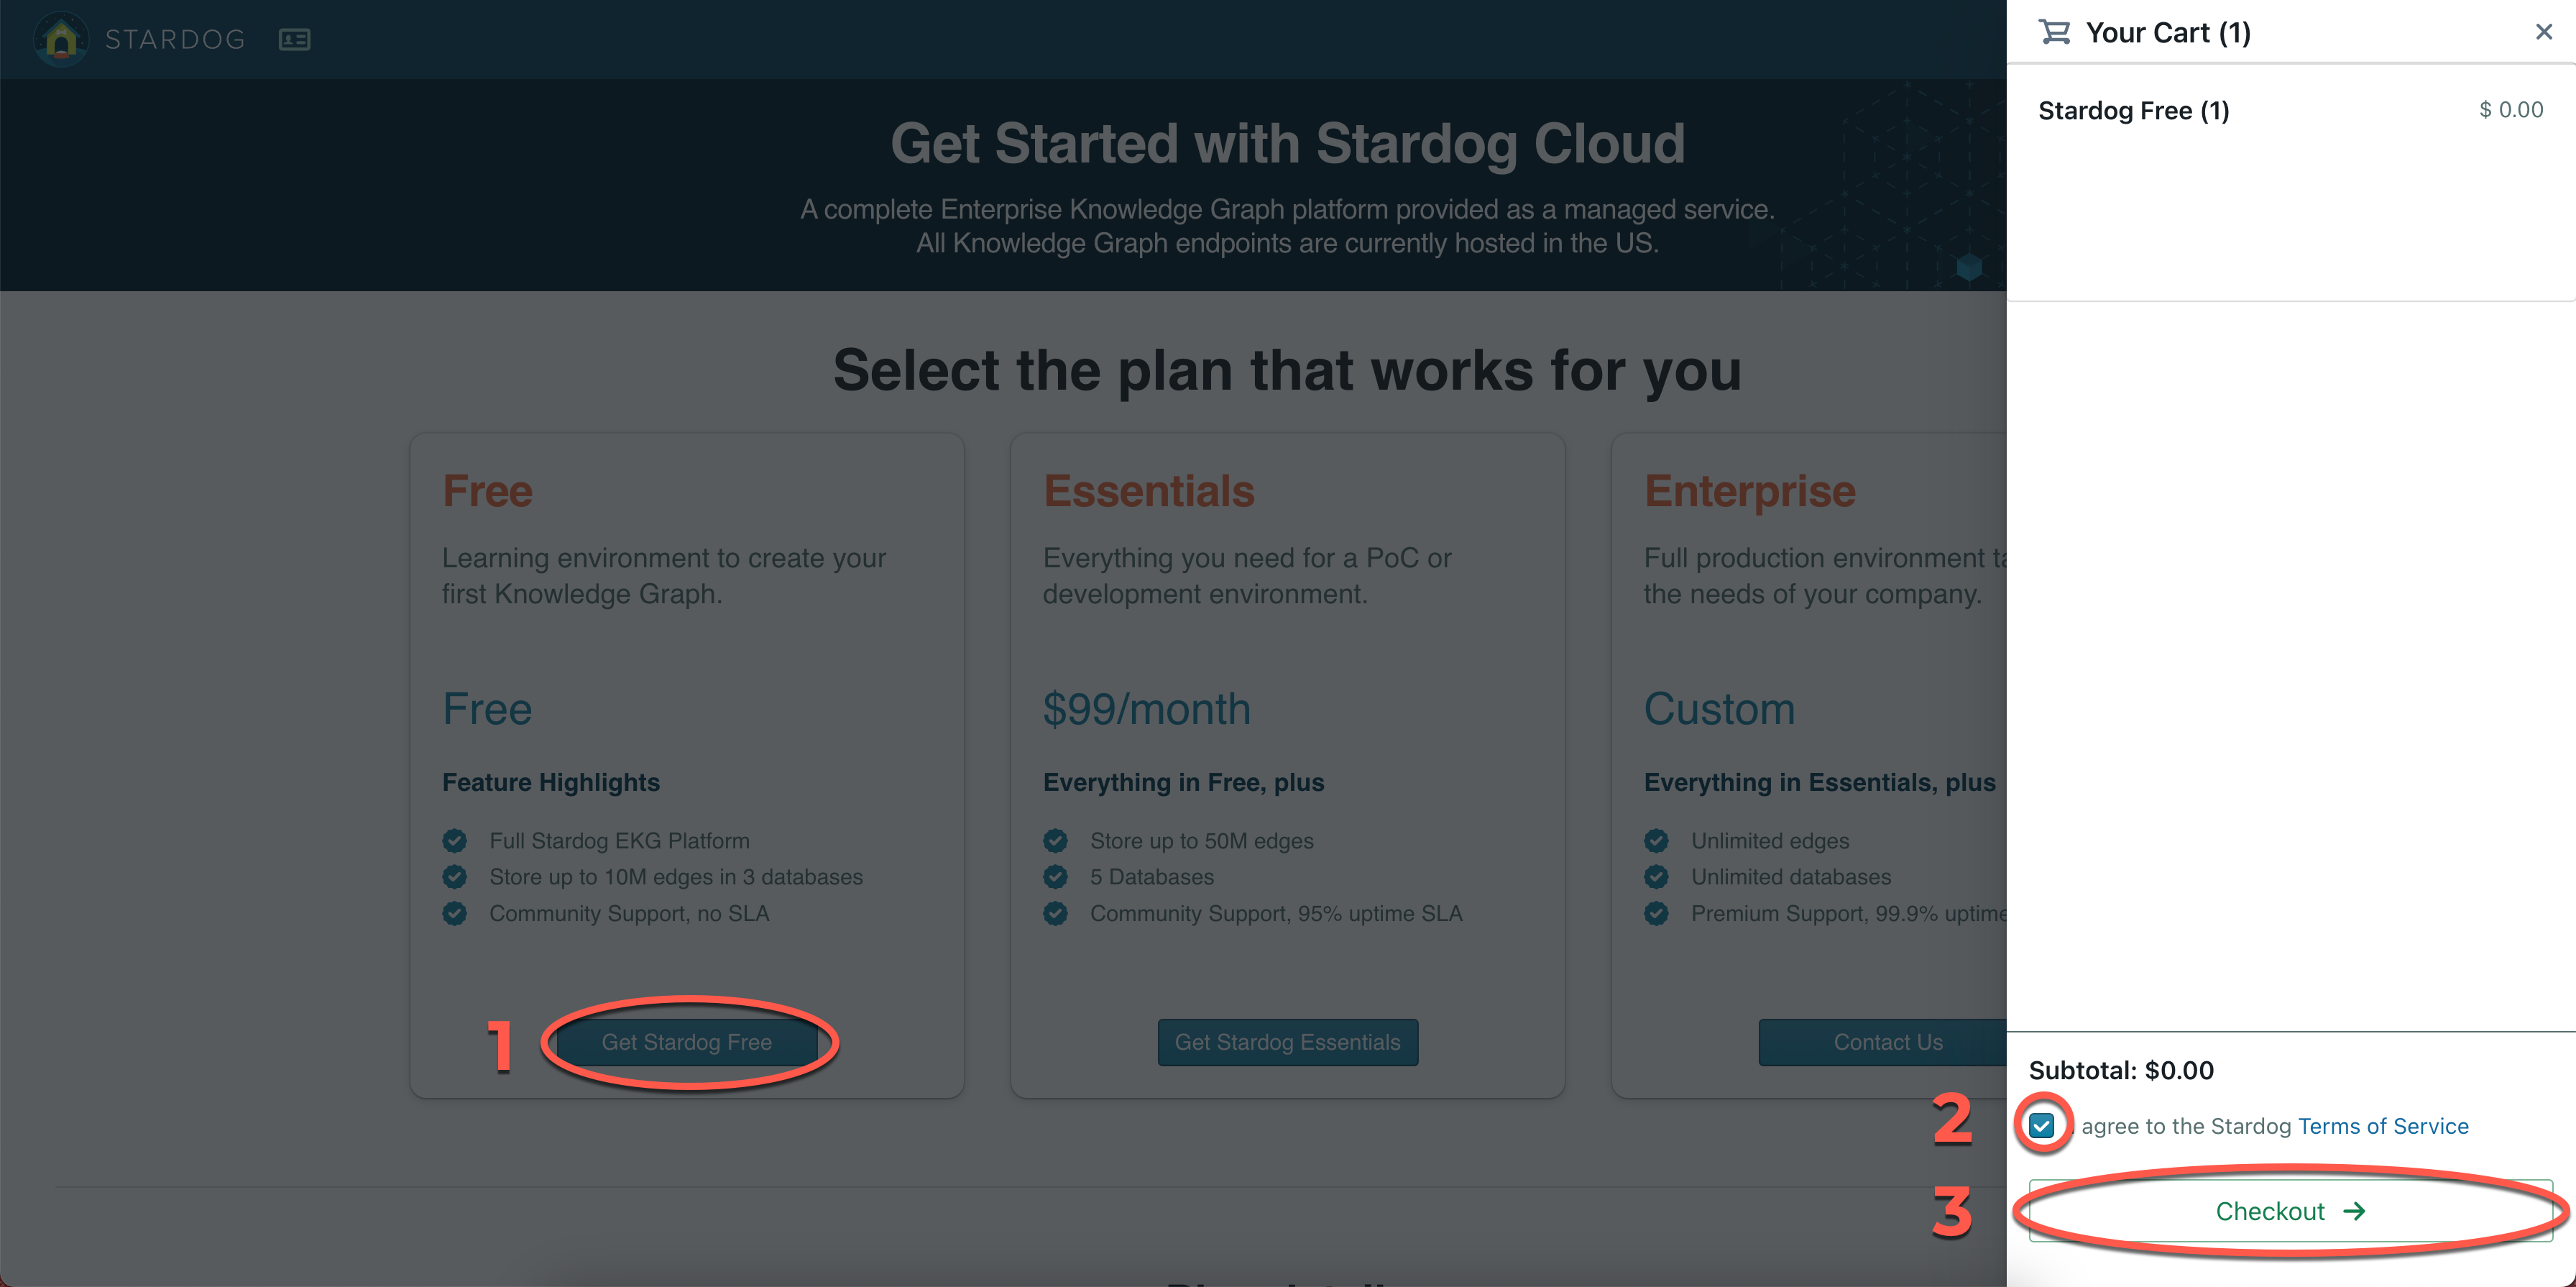
-
Click Get Stardog Free, check the box to agree to the Stardog terms of service, then click Checkout.
-
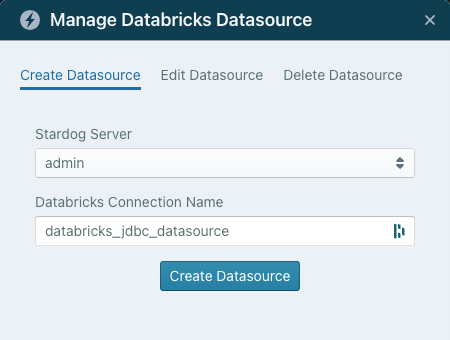
After your Stardog endpoint is provisioned, it will be associated with your account, and you will see it in your list of endpoints on the Stardog Cloud Portal. When your Stardog endpoint is ready, go to the Databricks Partner Connect page and create a datasource. Under Action, click the three-dot menu, then click Create datasource.

-
Optionally edit the data source name, then click Create Datasource.
What’s Next?
You can find videos about how to use knowledge kits with sample data in your Stardog account, or you can click your Databricks connection to access Stardog applications to start modeling your data.