Inviting and Configuring Users
Learn how to invite and configure users in Stardog Cloud.
Inviting users
You share a Stardog endpoint with other users from the Quick Actions section of the Stardog Cloud home page.
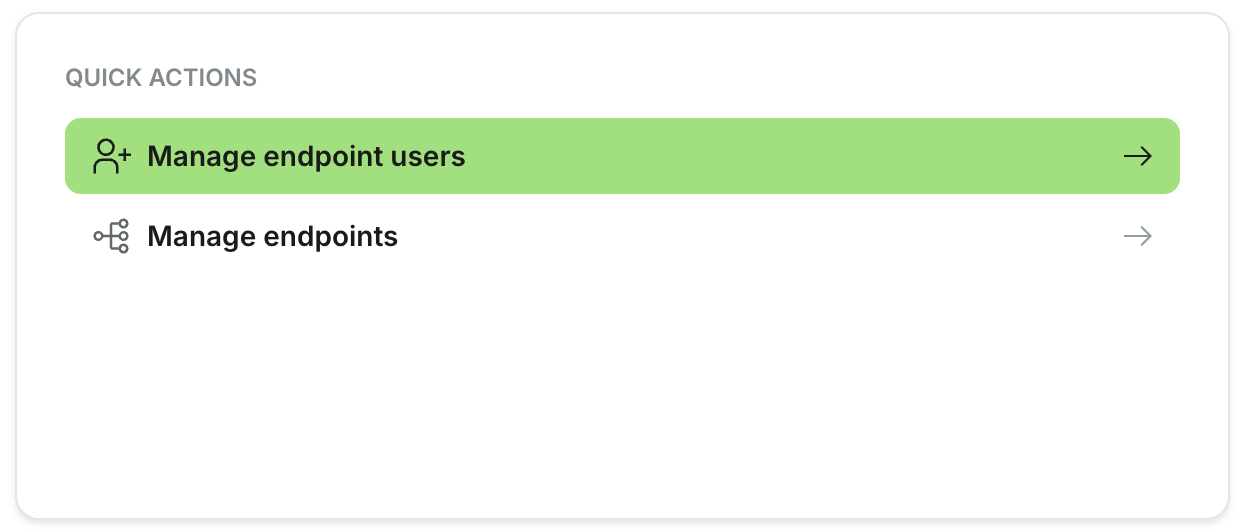
Quick Actions includes two options:
- Manage endpoints — Available to all users. Opens the Endpoints page, where you can view all of your endpoints, edit them, and connect to an existing endpoint or create a new one.
- Manage endpoint users — Opens the user management page for an endpoint, where you can view and manage the users who have access to it.
Who sees Manage endpoint users depends on your workspace:
- In a personal workspace, only the endpoint owner sees this option.
- In an organization, only organization owners and admins see this option.
To share an endpoint, open Manage endpoint users and add a user. The sharing dialog asks for the user’s email and the role you want to grant them on that endpoint. You can repeat this to share the endpoint with as many users as you’d like.
Roles and their permissions are defined in Stardog Studio. The sharing dialog assigns one of those existing roles to a user; editing the permissions associated with a role is still done in Studio.
User Configuration
Log into your Stardog Cloud Account and click the Stardog enpoint you wish to manage. From there, launch Stardog Studio, our Knowledge Graph IDE. With Studio you can administer your Stardog instance and create users. Your initial user will have administrative access to manage Stardog including:
- creating new users and roles
- deleting the users and roles that you have created
- creating new databases
- writing to existing databases
- deleting databases
- managing virtual graphs
- and more
Stardog uses role based access control (RBAC) similar to many traditional databases. To grant additional team members access we recommend that you provision additional users with access that is limited appropriately. For example, you could provision a new user that has the role reader (a role automatically configured by Stardog Cloud) for a new user you wish to be able to view data but not alter it.
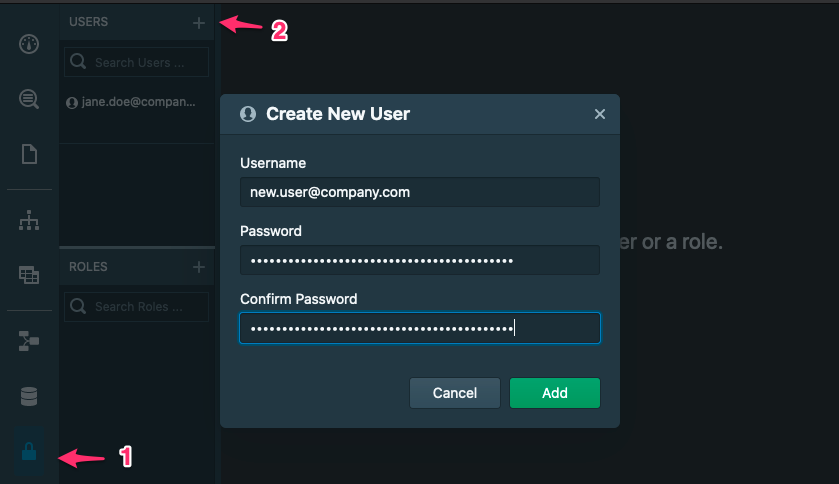
Creating a new user
Note that a Stardog user in your instance is not related to the Stardog Cloud Account used to log in to the Stardog Cloud Portal. The former authenticates a user with the instance itself, while the latter allows access to the Stardog Cloud Portal, where you can configure connections to multiple Stardog Server instances.
After creating a Stardog user with Studio, you can provide the username, password, and URL for the instance to a person who has created a Stardog Cloud Account; that person can then create a connection to the Stardog endpoint using the username, password, and URL that you provided.
We recommend that for any programmatic access to your Stardog instance you create a dedicated service account user and then limit the service account access to the minimum required by the application.
We recommend reviewing the Stardog permissions model to fully understand what is possible.
Much of the Stardog security documentation refers to configuring Stardog Server Authentication securely for on-premises deployments. With Stardog Cloud, your endpoint is configured by default to follow security best practices.